Example: Change drilldown layout
In this example, we have a default drilldown view as shown in Figure 1.
In the figure, you can see how the default setup looks in the Drilldown layout editor, and in the drilldown view from a run report. As you can see, the order of the columns matches the order in the Drilldown layout section.
The modules, dimensions, and fields may have different names in your ERP system.
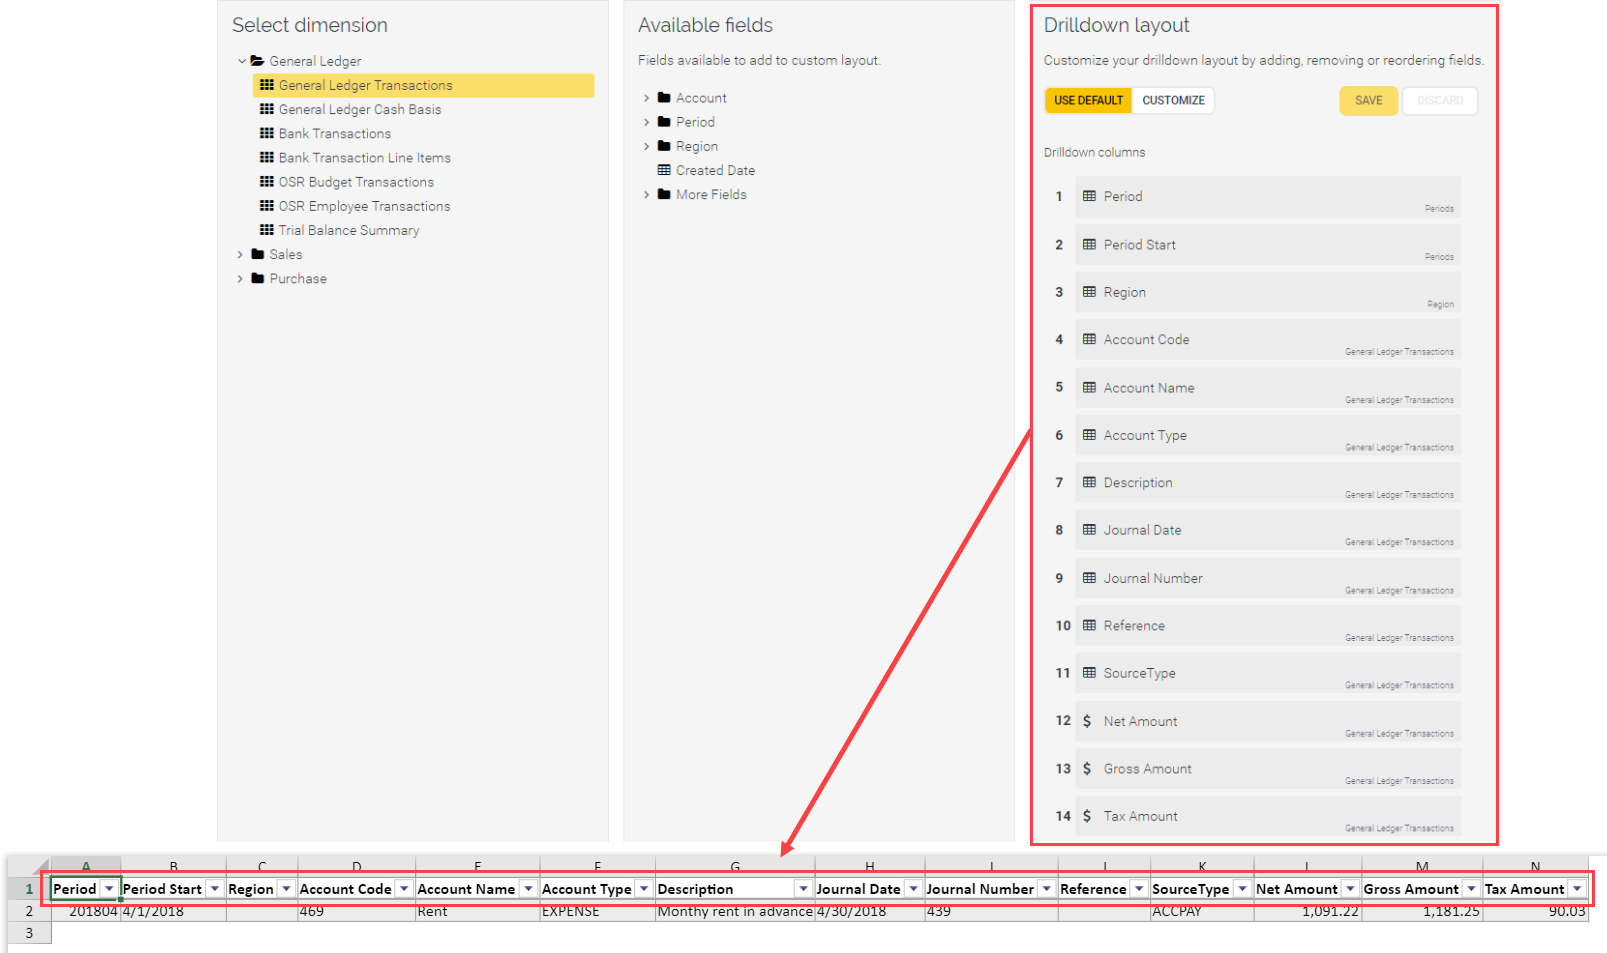 Figure 1 Default drilldown view
We want to make the following changes to the drilldown layout for reports based on General Ledger Transactions:
- Remove the Region field.
- Move the Net Amount after Description.
- Add Status field.
We then take the following steps:
- Click Drilldown layout.
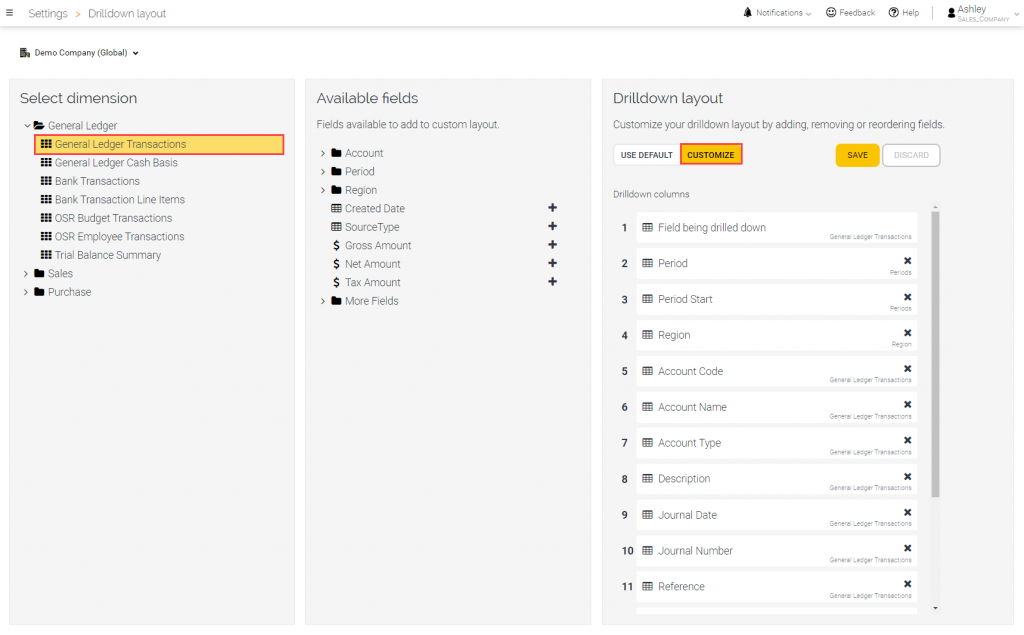
- Under Select dimension, click General Ledger folder, then click General Ledger Transactions. NOTE: The module, dimensions, and fields may have different names in your ERP system.
- Under Drilldown layout, click Customize.
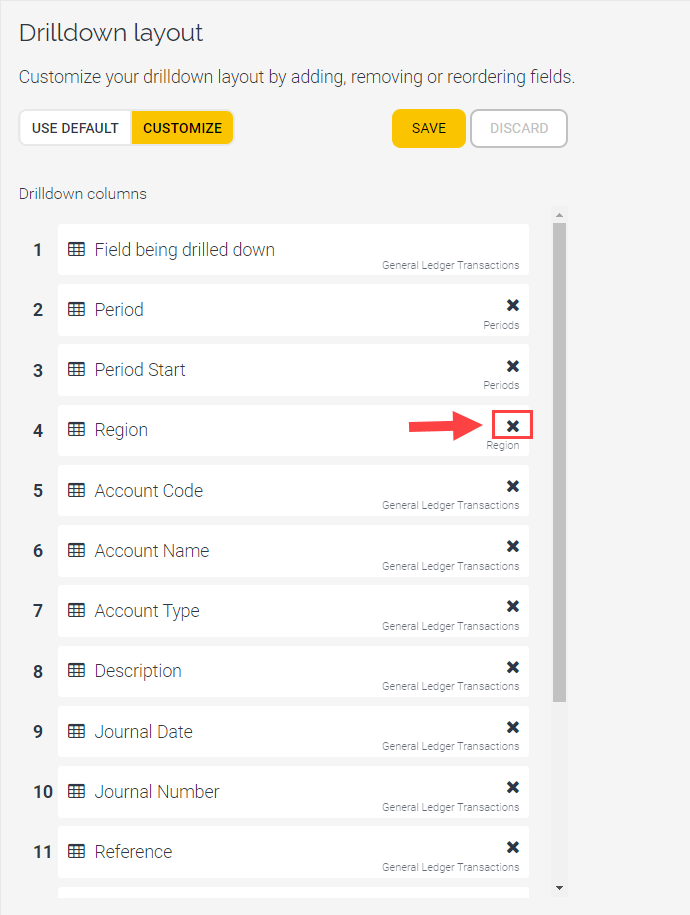
4. Under Drilldown layout, next to Region, click  Remove to remove the Region column from the layout.
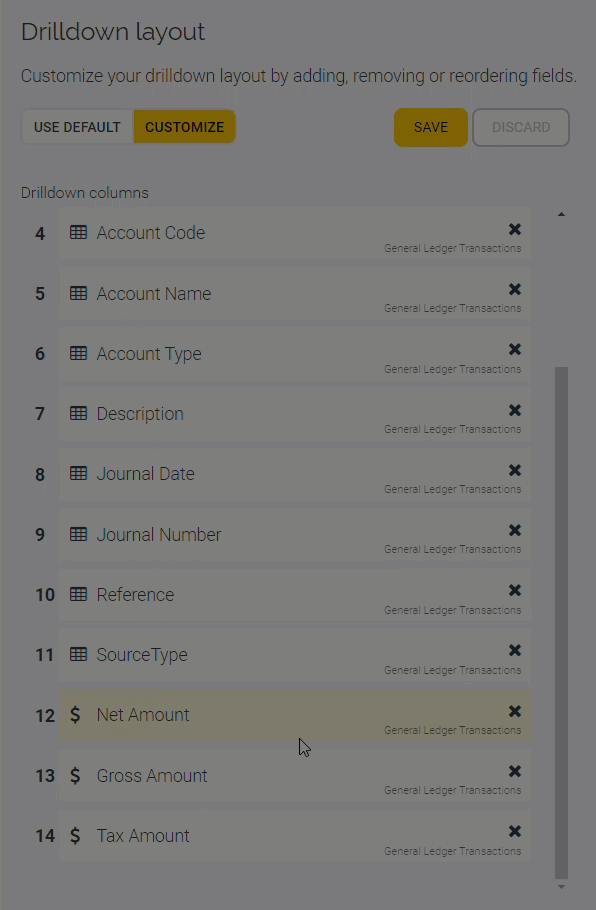
5. Under Drilldown layout, move Net Amount after Description.
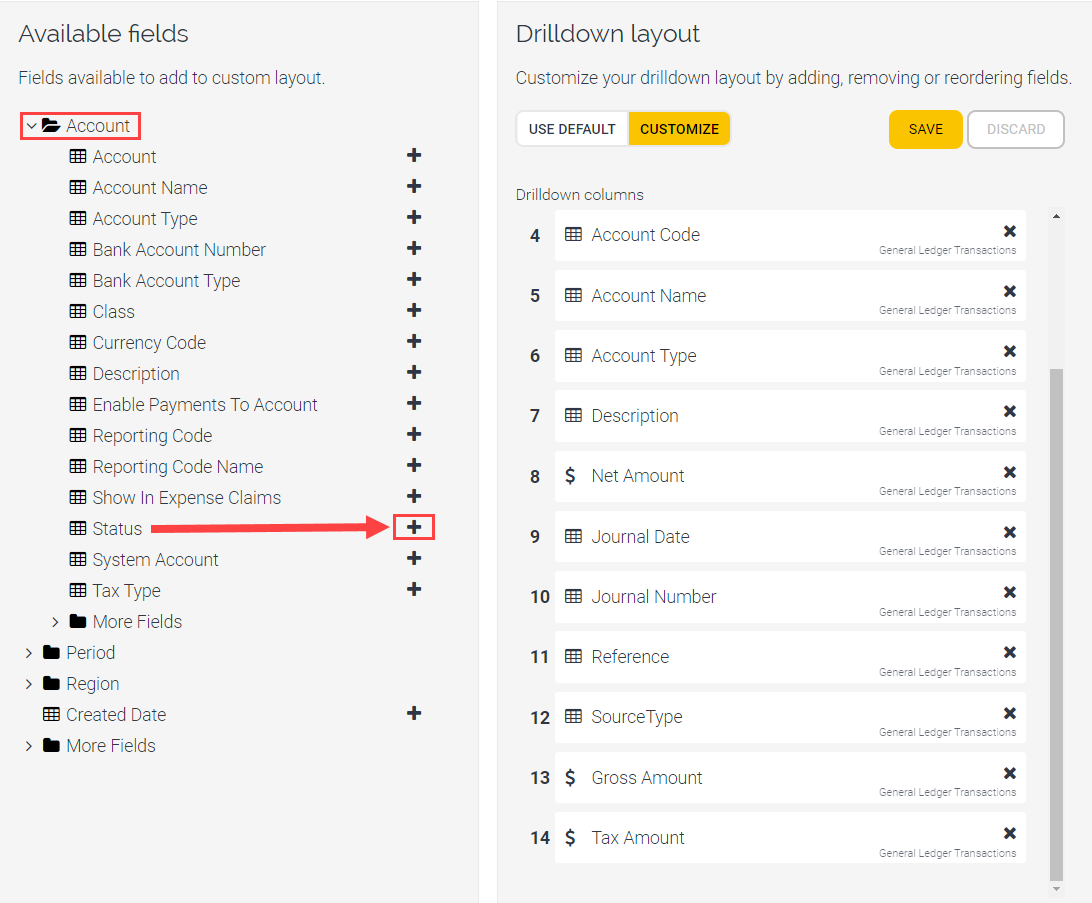
6. Under Available fields, open the Account folder and next to Status, click  Add. The Status column is added to the drilldown layout.
7. Click Save.
If we now run a report in Reporting, such as a Profit and Loss report, and drill down, we can see the following effects of the customizing in the figure below:
- the Region column is removed
- the Net Amount column is moved
- a Status column is added.
 Drilldown before customizing
 Drilldown after customizing