Budgeting
/onestopreporting/help/budgeting
section
Create and edit budget templates. Save budget data for further reporting. Distribute budget tasks directly or through the use of workflow.
2026-01-16T14:27:01+01:00
# Budgeting
Create and edit budget templates. Save budget data for further reporting. Distribute budget tasks directly or through the use of workflow.
## Budgeting
The **Budgeting** module allows you to design the budget model exactly as you want it, and enter budget data live online.
The budget data can be saved to your accounting system or be saved to the OneStop Reporting budget table and will be available in OneStop Reporting report templates.
To make data entry smooth and efficient, the **Budgeting** module features spreading (distribution rules), unit-/percent-based calculations, historical data, and line item details. You can also assign the budgeting to one or more users using the **Assign** function. For larger organisations, with multiple people involved in the budgeting process, it is advised to use the **Workflow** module.
There are essentially three ways to create a budget:
- Use the budget templates from OneStop Reporting. (see [Get budget templates](./get-budget-template))
- Build a budget template from scratch (see [Create new budget template](./create-budget) and [Create budget template in Report Designer](./create-budget-template-in-report-designer))
- Use an existing report and convert to a budget template (see [Create budget template in Report Designer](./create-budget-template-in-report-designer))
### Options in the Budgeting screen
 | Layout | Click one of these buttons to change the layout of the budget template view.
Under the button with three dots **...** 
And the **Three dots ...** on budget templates (only visible in thumbnail view) 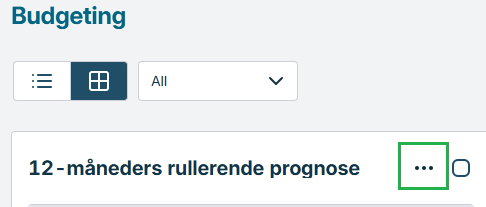
You will find these options
| **Button** | **Name** | **Description** |
|---|---|---|
|  | Open | Click here to open and view the selected budget template. |
|  | Edit | Click here to [edit](./edit-budget) the selected budget template. |
|  | Delete | Click here to delete the selected budget template(s). |
|  | Duplicate | Click here to create a copy of the selected budget template. See [Duplicate budget template](./duplicate-budget). |
|  | Publish | Click here to publish the budget template. This option is only available if the budget template is a draft (  ). See [Publish budget template](./publish-budget). |
|  | Categorize | Click this button to categorize the selected budget templates. See [Manage categories for Budgeting](./manage-categories-in-budgeting). |
|  | Assign | Click here to assign the budget template to one or more users. See [Assign budget template](./assign-budget). |
|  | Assignments | Click here to view assignments for the selected budget template. |
|  | Download | Click here to download the budget template (for example as a backup or to edit it offline). |
|  | Upload | Click here to upload a budget template to the portal. |
|  | New | Click here to create a new budget template. See [Create new budget template](./create-budget). |
|  | Get templates | Click here to install templates from the library. See [Get budget templates](./get-budget-template) for more information. |
Create new budget template
/onestopreporting/help/budgeting/create-budget
page
2026-01-16T14:27:01+01:00
# Create new budget template
This procedure describes how to create a budget template from scratch.
To create a budget template:
1. Click **Budgeting**.
2. Click on the button with three dots **...**
3. Click **New**. The **New budget** dialog is displayed.
4. Select a company. Data from this company will be used in your budget template.
5. Enter a name in the **Budget name** field. Use a logical name for the budget template to make it easy to identify.
6. Click **Create**. The budget template is added to the list, and has **Draft** status ().
7. Select the budget template in the list and click  **Edit** to open it in **Report Designer**.
> [!NOTE]
> If you have () selected a [category](./../manage-categories-in-budgeting) or categories, when you create a new budget template, the new budget template will automatically be added to that category or categories.
Create budget template in Report Designer
/onestopreporting/help/budgeting/create-budget-template-in-report-designer
page
2026-01-16T14:27:01+01:00
# Create budget template in Report Designer
See [Report Designer](./../../report-designer) for an overview of the user interface and basic functionality in **Report Designer**.
A budget template is created in a similar manner as a report. However, a budget template also includes storage rules that define how the budget data are stored in the OneStop Reporting budget table. It is important that you know how to use the Report Designer before you start creating a budget template.
In this section, we will discuss how you can add measure and storage rules to create a budget template. The storage rules are defined at the cell level.
In the following example, we have already defined the data that will be displayed in the budget template, such as accounts and periods.
### Add measure or calculated storage cell to the template
Drag the desired measure from the OSR budgeting Dataset, such as **Budget Amount**, into the form. The Budget Amount will be the input cell where the end user will enter their Budget numbers in the finished executed and prepared Budget template. Locate the Budget Amount in the Module bar and drag it into cell F12, as shown in the figure below. You define the storage rule on this level.

If you have a calculated value that you want to store to the budget table;
1. Click in the cell where the calculation is.
2. On the **Budgeting** tab, click **Create storage**.

### Budgeting tab -- Mapping Dimensions for storage {#budgeting-tab-mapping-dimensions-for-storage}
After the **Budget Amount** measure is dragged into the cell, or you have manually created a storage cell, you can see that a new tab appears in the **Layout Editor**. This is the **Budgeting** tab and it will appear when a cell contains a value, it is allowed to store back to the database.
The **Budgeting** tab contains information about which dimensions a transaction will be stored back to.
There are three main sections in this tab you need to pay attention to. They are:
- **Store To section**. In this section, you will enter the Dataset and measure you will store back to. Normally this will be the same measure you dragged into the cell.
- **Mandatory fields**. These are the fields that make up the key for selecting which dimensions that will be part of the selection for insert/update/delete a value.
- **Optional fields**. These are the fields that will get a value from the form, but they are not part of the key to select transactions for insert/update/delete.
The figure below illustrates the definition of storage of the value in a specific cell in the budget template:

The data input cell will automatically get a set of default fields that will define the value in the database. The fields are inherited from the context of the cell.
In this example, the dimensions, *OSR Scenario*, *Account*, *Period*, and *Region* define the context of this particular cell. The stored value will get the current expanded values of these dimensions when the end users work with the budget template in the portal.
The Budgeting store-back allows storage of both user-input cells and calculated cells. This is a strong feature as you may want to make allocations and store values to other accounts based on input values entered by the user.
### Budgeting tab -- Comparable data {#budgeting-tab-comparable-data}
The **Budgeting** tab has two sub dialogs. They are the **Define storage** and the **Comparable Data** dialogs. You can toggle between them by clicking the two arrows in the right bottom part of the **Budgeting** tab. The first picture shows the label when in the *Define storage* mode.
## 
When the **Budgeting** tab is in the *Comparable data* mode, it will look like this:
## 
See the following sections for detailed descriptions of the two different modes.
## Define storage
Below is a picture of the **Budgeting** tab and the different functions and elements in it. See table below for descriptions of the various elements.

| V | Name | Description |
|----|----|----|
| 1.0 | Store To | In this section, you will select the Dataset and field you will store back to. Normally this will be the same field you dragged into the cell. NOTE: It is not only the selected field (in this case the Budget Amount field) that is affected by the choice you make in the Store to section. You actually select the total transaction row that will be affected by the choice you make in the Mandatory fields and Optional fields sections described below. |
| 2.0 | Mandatory fields | The Mandatory fields are also referred to as Key fields. These are the fields that make up the key for selecting which dimensions will be part of the selection for insert/update/delete a row in the Dataset selected in the Store to section. This means that if it doesn't already exist in a Dataset row with the combination of the values of the fields in this section in the form instance, a new row will be inserted in the Dataset. The value in the cell in the context of these fields get written to the field selected in the Store to section. If a row with the combination of these fields already exists, the value in the cell will overwrite the existing value in the row. Some fields are absolutely mandatory. They are defined as mandatory by the metadata model for that specific ERP integration. They are marked with a lock symbol to the right and cannot be removed from the Mandatory fields section. Other fields you choose to be part of the Mandatory field key can be deleted again. These are marked with a delete symbol (cross). Technically speaking, all fields in the Mandatory fields section will be part of the WHERE -- clause when the row to insert, update, or delete will be searched for. The fields in the Mandatory fields section will get the assigned values specified in the right side of the mapping view. |
| 3.0 | Optional fields | These fields will also get values from the form, but they are not part of the key to select transactions for insert/update/delete. These fields will not play a role when rows are searched for being candidates for an insert/update/delete operation in the Dataset table selected in the 'Store to' section. Technically speaking, these fields will not be part of the WHERE clause when the row to insert/update/delete will be searched for. They will simply be inserted or updated when a row is found for the combination of the fields in the Mandatory fields section. |
| 4.0 | Data source reference options | Depending on the data type of the field and/or the placement in the Mandatory or Optional sections, the number and type of options may differ. Here is the complete list: Blank (empty) If you select the empty field, you will get a lookup option to help you select a value to assign to the field. This will be a constant value. \ This option means that you will have to enter a constant numeric value to be assigned to the field. '\' This option means that you will have to enter a constant string value within the apostrophes to be assigned to the field. =\ This option allows you to specify that a value in a cell should be stored into the field it is associated with. When selected, the Excel cell-reference functionality for selecting a cell in the Excel workbook will appear. This functionality supports the dynamic cell reference technology used by Excel. \*\ This option works the same way as the =\| option when it comes to how a cell reference value is selected and used. The difference is that this option will multiply the value of the cell to the value of the field. It can only be used with a field of a numeric data type. {\} There will be a list of attributes in braces. This list will be dynamic and depends on which attributes are already in the Excel form. In the example in the picture above the {Period}, {Account} and {Account Name} attributes are listed. All of them can be used for referencing values you can store back on the dimension that is selected. @\ There will be a list of parameters in braces. This list will be dynamic and depends on which parameters are already in the budget form. The example in the picture above, the {@Period}, {@Scenario}, and {@Region} attributes are listed. All of them can be used for referencing values you can store back on the dimension that is selected. |
| 5.0 | Settings | Conditional storage settings. For more information, see the \"Conditional storage settings section\" below. |
### Conditional storage settings

**Store unchanged cells:** This option will force data from this cell to always be stored. The application will not do a check whether the input cell has changed its value or not.
**Ignoring rows or columns:**
****
- **Use ignore flag on row:** If the first cell in a row contains a value, the entry is ignored; hence not stored. False, 0, or empty string count as no value.
- **Use ignore flag on column:** If the first cell in a column contains a value, the entry is ignored; hence not stored. False, 0, or empty string count as no value.
- **Use ignore flag on row or column:** If the first cell in either the row or column contains a value, the entry is ignored; hence not stored. False, 0, or empty string count as no value.
**Delete transactions if cell value is 0:** Means that cells including 0, NULL, or empty are not stored. This is useful when you have larger budgets to avoid creating unnecessary records.
**Delete transactions for empty cells:** Normally, values in a cell are deleted after pressing BACKSPACE or DEL or blanking out the value. If this option is selected, the value is used to update existing/insert a record in the storage dimension. This will also apply to transactions where there has been a value that has now been set to 0.
### Validation of content
There is also a certain validation process going on as you configure your **Define storage** dialog. When you have a valid set of mappings, the icon at the bottom left corner will be a green checkmark. If incomplete or the mapping was incorrectly done, you will get a red stop icon. In this case, the *Region* dimension field does not have a value or reference assigned:

## Define Comparable data
The **Comparable data** functionality allows the budget template creator to set up comparison data for the users performing the budgeting in the portal when using the **Spreading and Line Item Detail** tool (see [Line item details](./../report/edit-budget-data/add-line-item-details), [Spread function](./../report/edit-budget-data/spreading) and [Adjust function](./../report/edit-budget-data/adjusting)).
There are two main options for defining the comparable data;
- **Based on historical data:** If you use this option, you will get data from your accounting system.
- **Based on Excel range:** If you use this option, you must define the area in the Excel sheet you want to show when using comparable data in the **Spreading and Line Item Detail** tool.


When using the **Based on historical data** option, you must do the following:
- Drag a Measure field, such as posted amount, into the top part of the window as shown in the example below.
- Enter a title for the comparable data in the **Title**
- Select or deselect the **Include data from current fiscal year** checkbox: If you select this option, the current fiscal year and the previous year will be included (depending on the selected period parameter you run the budget for). If left blank, you will get the two previous years.

> [!NOTE]
> In the description above, only the period dimension is mentioned.
> Other dimensions that are used for selecting the Comparable data are inherited from the selections used in the template. If you want to override those selections, you can drag in dimensions from the module list and drop them in the section called *Filters override*. This is an advanced feature and should be used with care.
| | |
Get budget templates
/onestopreporting/help/budgeting/get-budget-template
page
2025-11-20T09:58:58+01:00
# Get budget templates
## Get budget templates from the library
1. Click on the button with three dots **...** to install the templates.
2. Choose **Get Templates** from the drop down list
3. Here you will see new templates, already installed templates that has an update and templates already installed.

3\. Choose the templates you want and click **Install.**

4\. After installing the templates you will see them here under **Budgeting**:

Edit budget template
/onestopreporting/help/budgeting/edit-budget
page
2026-01-16T14:27:01+01:00
# Edit budget template
When you have created the budget template, you may have to edit the contents before publishing and assigning it.
To do so:
1. Click **Budgeting**.
2. Select a budget template in the list.
3. Click the **Three dots**  in the top right corner of the budget card
4. Choose  **Edit** from the drop down meny. The budget template opens in Report Designer.
5. Edit, save and close the budget template.
6. Click  **Publish** to publish your changes.
> [!NOTE]
> If you have selected more than one budget template, the **Edit** button is not available.
> See [Create budget template in Report Designer](./../create-budget-template-in-report-designer) for more information.
## Edit budget template that is part of a workflow
If the budget template you want to edit is part of a workflow, you will receive the following message:
*"This budget template is used in assignments or workflows. If you choose to edit this budget template, these assignments or workflows will be updated. Please be aware that any changes you make may affect the budgeting process.*
> [!NOTE]
> Make sure you do not change any report parameters as this will prevent you from publishing your changes."***
To edit the budget template, click **Edit anyway**.
- You can edit most aspects of the budget templates apart from report parameters. If you attempt to edit the report parameters, you will not be able to publish and must undo the edit.
To undo the edit;
1. In **Budgeting**, click  in the top right corner to show details of the budget template.
2. Click  **Undo edit**.

After you have edited a budget template that is part of a workflow, the assignees must rerun any templates they have run before.
If they have the budget template open, they will receive a message from the system that the template is updated. If they run the template, they will lose any changes they have made since they last saved.
Open budget template
/onestopreporting/help/budgeting/report
section
2026-01-16T14:27:01+01:00
# Open budget template
When you open a new budget template, it contains no data. You must first enter the relevant parameters (such as period, scenario and department) and click **Run** to generate the budget template.
Open the budget template using one of these methods:
- Click on the budget template thumbnail.
- Select () the budget template from the list, and click on the **three dots**  on the Budget card, then choose **Open** from the dropdown list.
- Click the name of the template in the list.
The following options are available:
| **Button** | **Name** | **Description** |
|---|---|---|
| | **Parameters** | Click  to select/edit the relevant parameters for the budget template. |
|  | **Run** | Click here to generate the budget template. See [Run budget](./run-budget). All generated budget templates can be viewed in the [History dialog](./view-budget-history). |
|  | **Save data** | Click here to save any changes you have made to the budget template. |
|  | **Publish** | Click here to publish the budget template. This option is only available if the budget template is a draft. See [Publish budget template](./../publish-budget). |
|  | **Edit** | Click here to edit the budget in Report Designer. See [Edit budget template](./../edit-budget). |
|  | **Assign** | Click this button to assign the budget template to one or more users. See [Assign budget template](./../assign-budget). |
|  | **Delete** | Click here to delete the most recent version of the budget template. |
|  | **Export to Excel** | Click here to export the budget to Excel. |
|  | **Log** | Click here to view the budget history. See [View budget history](./view-budget-history). |
|  | **Close** | Click here to close the budget template. If you have made any changes to the budget template, a dialog will ask you to confirm. |
See also: [Drilldown and voucher view](./../../archive/report/drilldown-and-voucher-view)
Run budget template
/onestopreporting/help/budgeting/report/run-budget
page
2025-05-27T09:08:46+02:00
# Run budget template
To add data to a new budget template or update an existing budget template with new data, you must run the budget template.
To do so:
1. Open the budget template using one of these methods:
- Click on the budget template thumbnail.
- Select the budget template from the list, and click on the **three dots** , on the bugeting card. Choose **Open** from the dropdown list.
- Click the budget template in the list.
2. Click  to select/edit the relevant parameters for the budget template.
3. Click **Run**. The budget template is updated.
Se also: [Drilldown and voucher view](./../../../archive/report/drilldown-and-voucher-view)
Edit budget data
/onestopreporting/help/budgeting/report/edit-budget-data
section
2026-01-16T14:27:01+01:00
# Edit budget data
> [!TIP]
> Above the spreadsheet, you can see the time the spreadsheet was updated.
- Summary cells (bold text) cannot be edited.
- Grey cells contain Line Item Details or values from the database, and cannot be edited.
Click **Save data** to save your work. The data is saved to the budget table.
To access additional editing options, click the arrow next to **Spreading and Line item details** at the bottom of the spreadsheet.
Click  in the upper right corner to access the **Spreading** and **Adjusting** functionality.
- [Spreading](./spreading): Instead of manually entering data, you can use the **Spread** function to enter calculated values based on the total amount you want to be distributed across the cells in a row.
- [Adjusting](./adjusting): You can use **Adjust** to increase or decrease an amount by a number of units or a percentage.
- [Line item details](./add-line-item-details): You can use this function to specify additional details on the same dimension value (row). You can, for instance, specify a detailed list of expenses on the same account.
Spread function
/onestopreporting/help/budgeting/report/edit-budget-data/spreading
page
2026-01-16T14:27:01+01:00
# Spread function
Instead of manually entering data, you can use the **Spread** function to enter calculated values based on the total amount you want to be distributed across the cells in a row. You can, for example, spread 24000 across 12 periods (months) using the distribution rule **Even**, so the value of each cell in a 12 month period is set to 2000. The default distribution rule is **Even**, but you can create [custom distribution rules](../../../../administration/periodic-keys/) to spread the amount differently. You can also use spread based on the comparable data set up in the budget template. For more information, see the **Define Comparable data** section in [Create budget template in Report Designer.](../../../create-budget-template-in-report-designer)
> [!TIP]
> This method can also be used to spread an amount across a line item detail. See [Add line item details](../add-line-item-details).
To spread an amount across a row (main line):
1. In the open budget template, click any cell in the row you want to edit.
2. Click the arrow next to **Spreading and Line item details** at the bottom of the spreadsheet. The name and row number of the selected row is displayed at the top of the **Spreading** pop-up window.
3. If the **Spread** function is not visible, click  in the top-right corner of the **Spreading** pop-up window.
4. Enter the amount in the **Spread amount** field.
5. Select a rule in the **Using distribution rule** list.
6. (optional) Select a line item detail. See [Add line item details](../add-line-item-details).
7. Click **Spread**. The amount is spread across the row according to the selected rule.
8. (optional) Repeat steps 4-7 to spread additional amounts across other line items.
Adjust function
/onestopreporting/help/budgeting/report/edit-budget-data/adjusting
page
2026-01-16T14:27:01+01:00
# Adjust function
An alternative to the **Spread** function, is the **Adjust** function. You can use **Adjust** to increase or decrease an amount by a number of units or a percentage.
> [!TIP]
> This method can also be used to spread an amount across a line item detail. See [Add line item details](./../add-line-item-details).
To adjust the amounts across a row (main line):
1. In the open budget template, click any cell in row you want to edit.
2. Click the arrow next to **Spreading and Line item details** at the bottom of the spreadsheet. The name and row number of the selected row is displayed at the top of the **Spreading** pop-up window.
3. If the **Spreading** function is not visible, click  in top-right corner.
4. Click **Adjust**.
5. Select the base line in the **Based on** list (usually **Main line**).
6. In the **Adjust each value by field**, do one of the following:
- Enter a percentage (positive or negative) and click the **%** button. Note: This will not work if the Main line is empty.
- Enter an amount (positive or negative) and click **Units**.
7. (optional) Select a line item detail. See [Add line item details](./../add-line-item-details).
8. Click **Adjust**. The amount is adjusted across the row.
Add line item details
/onestopreporting/help/budgeting/report/edit-budget-data/add-line-item-details
page
2026-01-16T14:27:01+01:00
# Add line item details
The **Line item details** function is found in the **Spreading** pop-up window. You can use this function to specify additional details on the same dimension value (row). You can, for instance, specify a detailed list of expenses on the same account.
To add a line item detail to a row:
1. In the open budget template, click any cell in the row you want to edit.
2. Click the arrow next to **Spreading and Line item details** at the bottom of the spreadsheet. The name and row number of the selected row is displayed at the top of the **Spreading** pop-up window.
3. Click the first cell in the **Description** column under **Line item details**.
4. Enter a name for the line item detail.
5. Click **ENTER** to add another line item detail. You can enter as many line item details as you want.
6. Enter values in the cells in the rows, or use the [**Spread**](../spreading) or [**Adjust**](../adjusting) functions. The values in the columns are summarized on the **Main line** at the top.
7. (optional) Select a cell and enter a comment in the **Line item detail comment** field.

Line item details are indicated by comments in the cells.

> [!NOTE]
> When using the *Line item details* function, the main line is locked from any further data entry. This prevents inconsistencies between the total detailed amount and the number shown in the form's cell.
View budget history
/onestopreporting/help/budgeting/report/view-budget-history
page
2024-08-07T11:22:23+03:00
# View budget history
You can view the history of a budget template to see when it was last generated and what parameters were used.
In order to do so:
1. Open a budget template.
2. Click  **Log**. The **Log** dialog opens with a list of previously run budget templates.
Assign budget template
/onestopreporting/help/budgeting/assign-budget
page
2026-01-16T14:27:01+01:00
# Assign budget template
You can assign users to fill in the budget template. You can predefine the parameter values when assigning a budget template to each user (such as company or department) or let the user decide.
> [!NOTE]
> The **Workflow** module provides a more advanced way of handling assignments, including review/approver steps and status overview.
1. Click **Budgeting**.
2. Select the budget template you want to assign. Only published budget templates can be assigned.
3. Click on the **three dots**  at the top right of the Budget card.
4. Choose  **Assign** from the drop down list. The **Assign budget** dialog is displayed.
5. Select the relevant parameters, or select **Let the user decide** to let the users select the relevant parameter values. NOTE: If you use the Let the user decide option, the user will only get the parameter values they are authorized to see. Refer to [Set permissions and data access for a user](../../management/users/add-company-access-for-multiple-users).
6. Select the users to whom you want to assign the budget template:
- **Add users from roles**: Click this option to select all users from a role.
- **Add user**: Click this option to select individual users. Start typing a name to search or click the arrow button to show a list of users.
- Click  **Remove** in the **Selected users** list to remove individual users.
7. Click **Assign** when you are done. The budget template is assigned to the selected users, and they will receive an assignment. See [Assignment](../../assignments).
To view all assignments for a budget template, select the budget template and click  **Assignments**. You can also delete assignments for individual users, but you should first verify that the users have not started working on the budget template.
Duplicate budget template
/onestopreporting/help/budgeting/duplicate-budget
page
2026-01-16T14:27:01+01:00
# Duplicate budget template
To duplicate a budget template:
1. Click **Budgeting**.
2. Select a budget template.
3. Click on the **Three dots**  at the top right of the Budget card.
4. Choose  **Duplicate**. from the drop down list. The **Duplicate budget** dialog is displayed.
5. Enter a name for the new budget template.
6. Click **Duplicate**. The budget template is copied and added to the list with the same status (draft or published) as the original budget template.
> [!TIP]
> If you have () selected a [category](./../manage-categories-in-budgeting) or categories when you duplicate a budget template, the duplicated budget template will automatically be added to that category or categories.
Publish budget template
/onestopreporting/help/budgeting/publish-budget
page
2025-05-27T09:08:46+02:00
# Publish budget template
Select a budget template with **Draft** status () in the list.
**Or** open a budget template with **Draft** status (), and click the **Three dots** 
Choose  **Publish** from the drop down list.
The budget template will now be "official". You can now assign the budget template to other users.
Manage categories in Budgeting
/onestopreporting/help/budgeting/manage-categories-in-budgeting
page
2026-01-16T14:27:01+01:00
# Manage categories in Budgeting
Use categories to organize your templates, making them easy to locate and identify. You can create private categories for your personal use or share the categories with your colleagues. Categories can be organized in a two-level hierarchy to support a logical structure.
**Example**: Create a \"Sector\" category with sub-categories \"Public\" and \"Private\".
### Categorize templates
> [!NOTE]
> Assigning a template to a category will make the template visible to other users as soon as it is published.
1. Click **Budgeting**.
2. Select the budget templates or packages you want to categorize.
3. Click on the **three dots**, or the button with three dots **...** in the upper right corner of your screen (if you want to categorize multiple budget templates at the same time)

4. Choose  **Categorize**. The **Assign to categories** dialog is displayed.
5. Select () the categories you want use. You can also unassign categories by deselecting categories ().
6. **Note**: Categories marked with  have already been assigned to some of the selected report templates.
7. Click **Apply**.
To see the report templates you have categorized, select the relevant category/categories in the [**Search & filter**](../../search-filter)bar.
### Create category
1. Click **Budgeting**.
2. Go to the **Categories** section in the [**Search & filter**](../../search-filter) bar.
3. Click **+New category**. The **New category** dialog is displayed.
4. Enter the name of the category.
5. Enter a description of the category.
6. (optional) Select a parent category. **Note**: If a parent category has been shared with other users, sub-categories will also be visible to these users.
7. Click **Create category**.
> [!TIP]
> You can drag and drop categories and category folders to change their order.
### Share category
You can share your categories to give your colleagues access to the report templates in specific categories. In addition, your colleagues will be able to use your categories to categorize their report templates. They can not, however, share your categories with other people.
In order to share a category:
1. Click **Budgeting**.
2. Go to the **Categories** section in the [**Search & filter**](../../search-filter) bar.
3. Hold the mouse-pointer over the category you want to share. If the category contains sub-categories, the sub-categories will also be shared. If you share a sub-category, the top-level category will not be visible.
4. Click . The **Share category** dialog is displayed.
5. Select the users with whom you want to share the category:
- Search: Use the **Search** field to search for and select individual users.
- Roles: In the top part of the list, you can select one or more roles. The category will be shared with all users belonging to the roles you have selected.
- Users: Select individual users in the list.
6. Click **Apply**. The user(s) will see the shared category (and any sub-categories) under **Shared with me** in the **Budgeting** screen. They will also see the report templates in the shared category and sub-categories.
> [!NOTE]
> A budget template in a shared category can be assigned to other categories by the users with whom you share your category.
> These categories can, in turn, be shared with other users than the ones with whom you originally shared your category. To \"withdraw\" the template from other users, you must remove it from the shared category. Unsharing your category will not have any effect on shared categories that you do not own.