How to enable UI Automation
/vismanetapi/setting-up-your-integration/ui-automation/activating-ui-automation
section
Steps to enable UI Automation for a customer's specific company.
2025-11-28T09:38:52+01:00
# How to enable UI Automation
Steps to enable UI Automation for a customer's specific company.
## Activating a UI Automation in Visma Net
You can enable UI Automation for a customer's specific company using the
scope vismanet_erp_service_api:ui-extension in the Visma Net Service
API. Once your application has been granted tenant access by the
customer through the App Store, you can register your UI Automation by
making a POST request to the Visma Net Service API.
## Manage activation
When working with UI Automation, you will need to create an owner ID
(UUID). This ID should be used when interacting with the API. Remember
to keep this secret.
### Sample flow setup
Step 1 and 2 should now be complete if you have followed the previous instructions in this document. This section will cover the third and final step.
- **~~Step 1~~**: ~~Publish application to app store (invitation code)~~
- **~~Step 2~~**: ~~Subscribe to webhook event tenant application added~~
- **Step 3**: Use POST /v1/uiExtension-endpoint to
activate the application on the company (tenantId)
## Activation API overview
> \[!TIP\]
>
> See full API documentation at:
>
## How to use UiExtension endpoint
**OAuth 2.0 Authorization method:**
**Grant type**: Client Credentials
**Access token URL**:
**Client secret**: \*\*\*\*\*\*\*\*\*\*\*\*\*\*\*\*\*\*
**Scope**: vismanet_erp_service_api:ui-extension
**Tenant_id**: \*\*\*\*\*\*\*\*\*\*\*\*\*\*\*\*\*\*
### Activating and deleting Action UI Automation
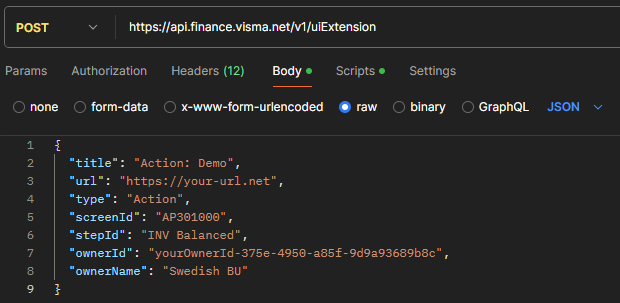
**Example**: If you want your UI automation application to be reached
via an action button from ScreenId=AP301000 for balanced documents:

To create an action button using the API you send a POST request to
/v1/uiExtension:
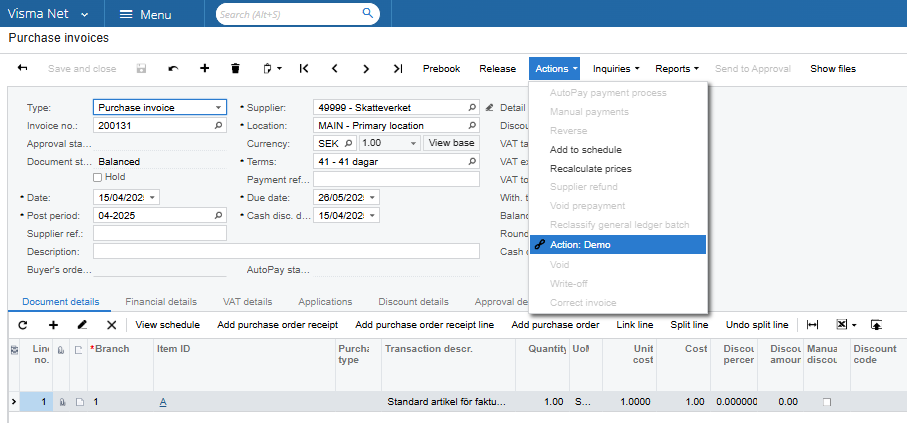
If request is successful your action would now be visible in
ScreenId=AP301000 for balanced documents:
**Delete Action:**
To delete this Action, you would use this call:
DELETE v1/uiExtension/{ownerId}/{internalId}/{screenId}/{stepId}
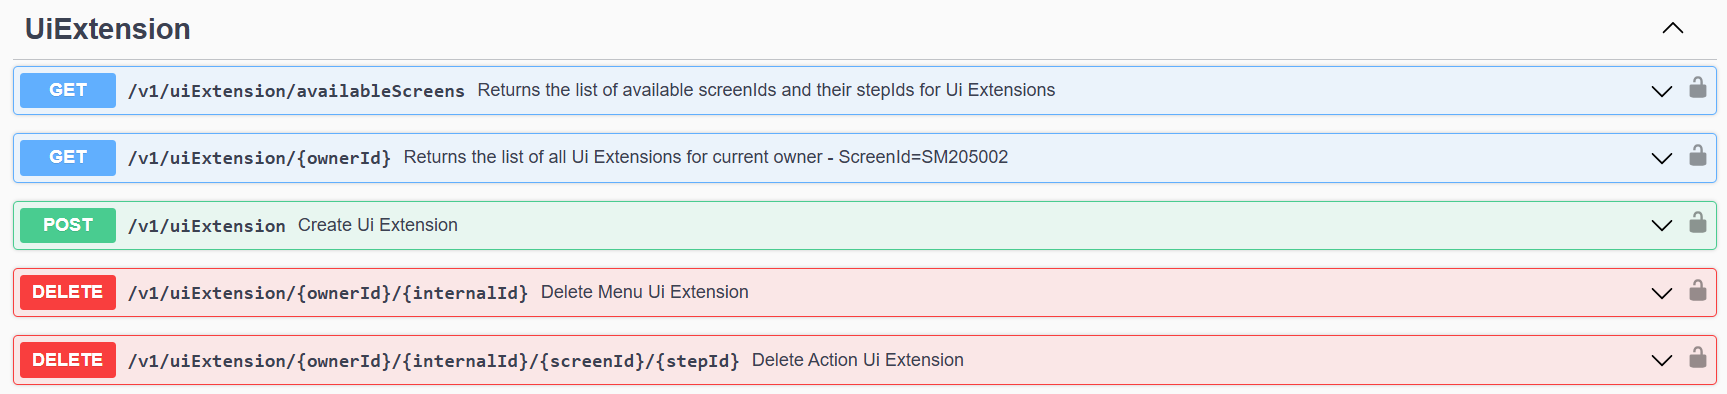
To find the information needed for the url above, you can use:
GET /v1/uiExtension/v1/uiExtension/{ownerId}
### Activating and deleting Menu UI Automation**
**Example:** If you want your UI automation application to be reached
via a menu button from the Visma Net ERP.
To create a menu using the API you must first make the API-request and
then in the ERP you select where you want to place the menu.
**Step 1:**
POST /v1/uiExtension 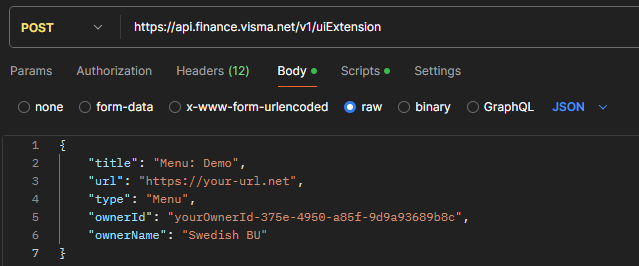
**Step 2:** To edit the menu, you need to have the Visma Net Role:
System administrator in ScreenId=SM201010.
For menu UI Automation, a user of the Visma Net company has to modify
the menu by pressing \>Menu\>Edit menu\>The preferred workplace\>+ Add
Menu item\>search for title\>Add and close 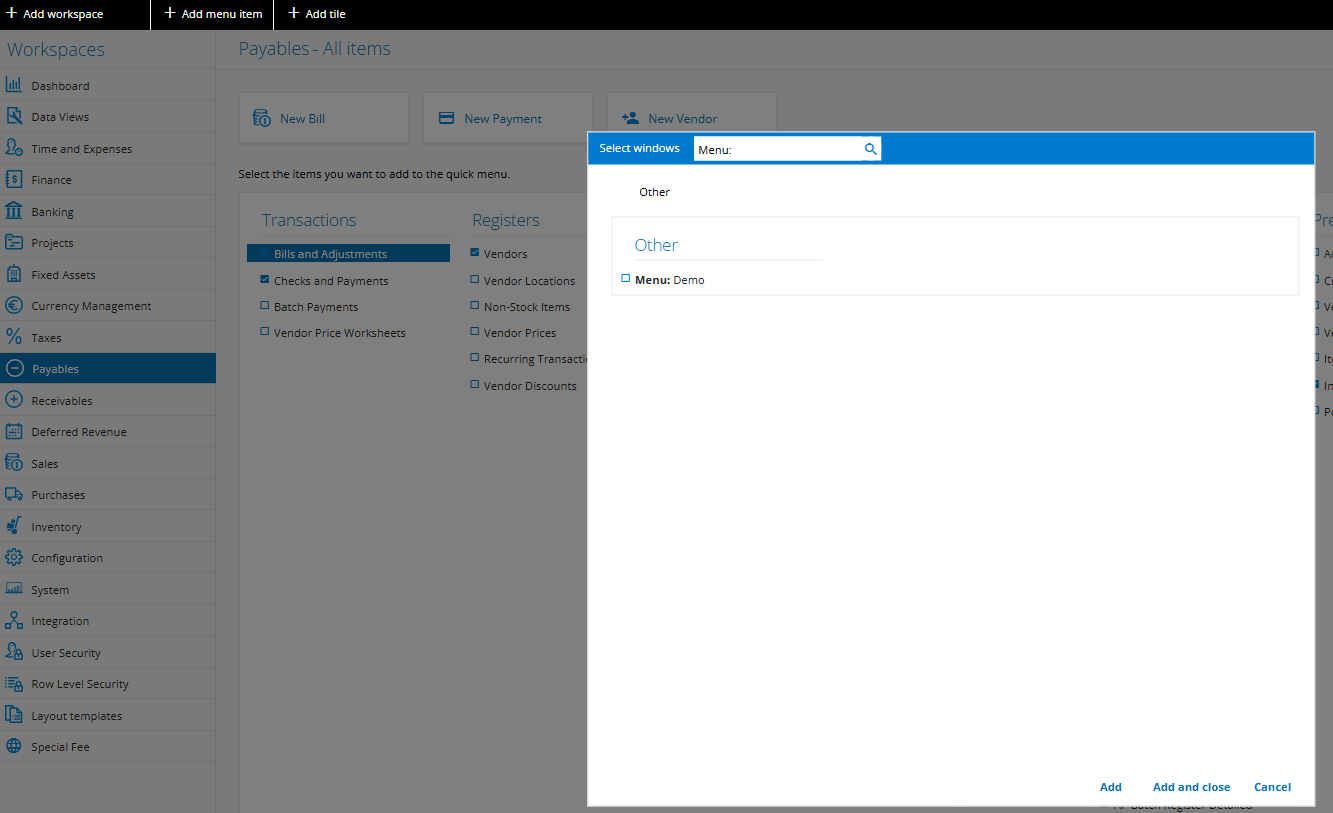
**Step 3:**
The new menu will be placed under "Other." From there, you can modify
the quick menu settings to place the newly created UI UI Automation menu
wherever preferred.
**Delete Menu:**
To delete this menu, you would use this call:
DELETE
To find the information needed for the url above, you can use:
GET