Setup webhooks for your application
/vismanetapi/setting-up-your-integration/webhooks/setup-webhooks-for-your-application
section
Learn how to setup webhooks for your application in Developer Portal
2025-12-03T12:39:59+01:00
# Setup webhooks for your application
Learn how to setup webhooks for your application in Developer Portal
> [!TIP]
> [Additional guide can also be found on the the webhook course at Visma Learning Universe](https://www.vismalearninguniverse.com/learn/courses/1535/vismanet-erp-webhooks?hash=16e8c684557cdcb32685a9aa20551ad2241ed4ac&generated_by=37643)
## Subscribing to Webhooks
To begin using webhooks in Visma Net ERP, we need to create a subscription to webhook events for your application in the Developer Portal.
Follow the steps below to get started.
1. **Log in to the [Visma Developer Portal](https://oauth.developers.visma.com/service-registry)**
- Navigate to **My Applications**.
2. **Find Your Application**
- Locate the application that is integrated with the ERP API.
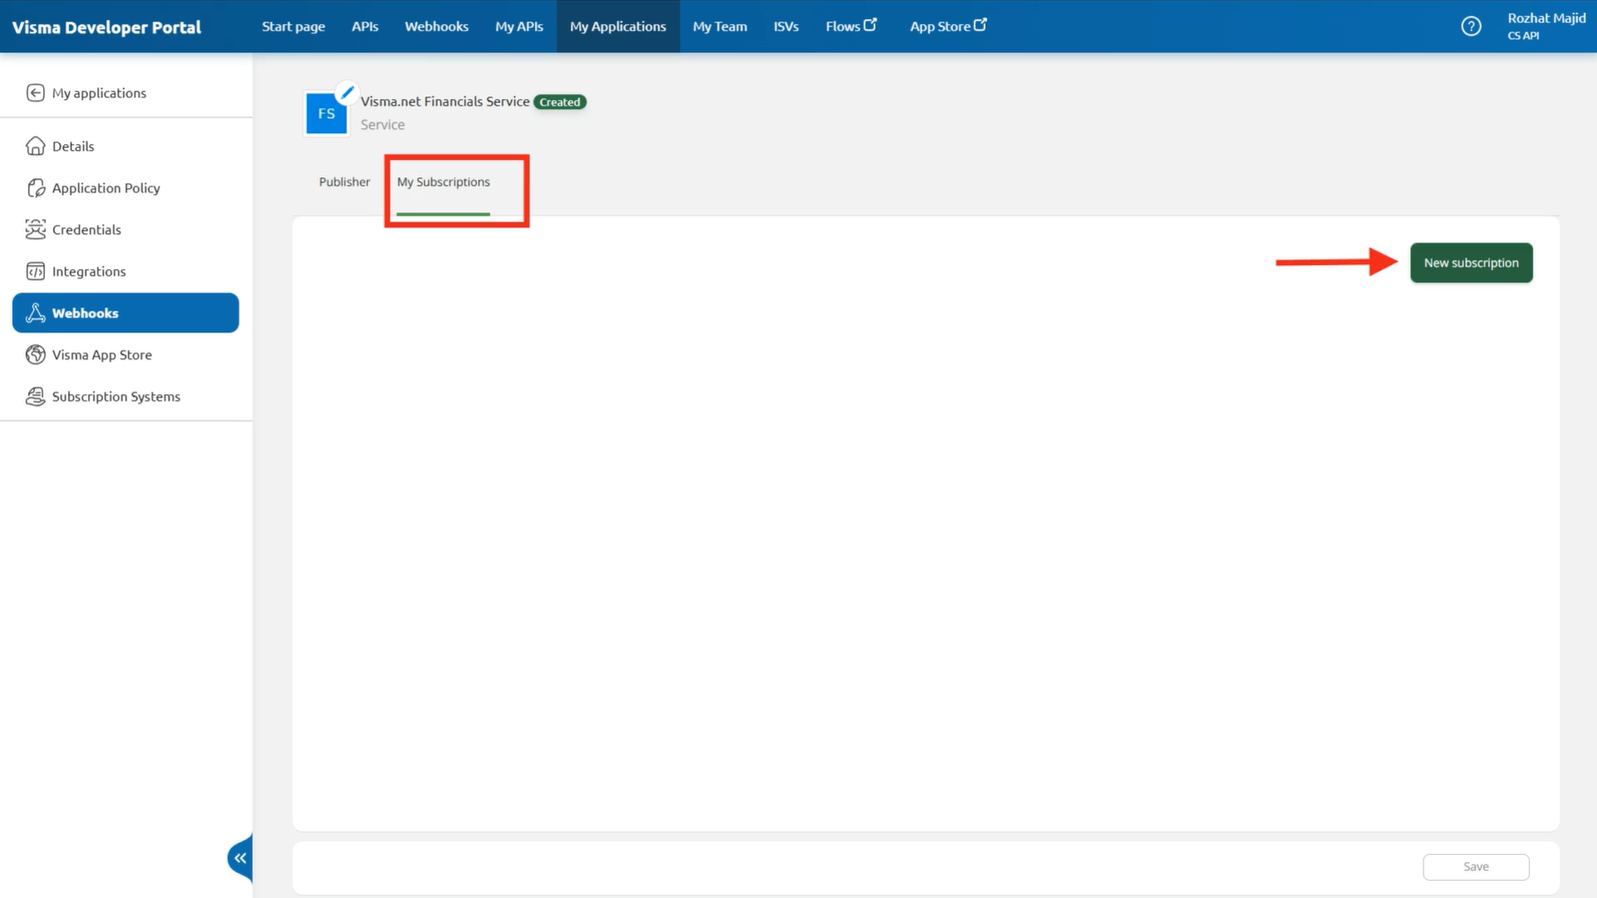
3. **Create a New Subscription**
- Go to **My Subscriptions** and click the **New Subscription** button.
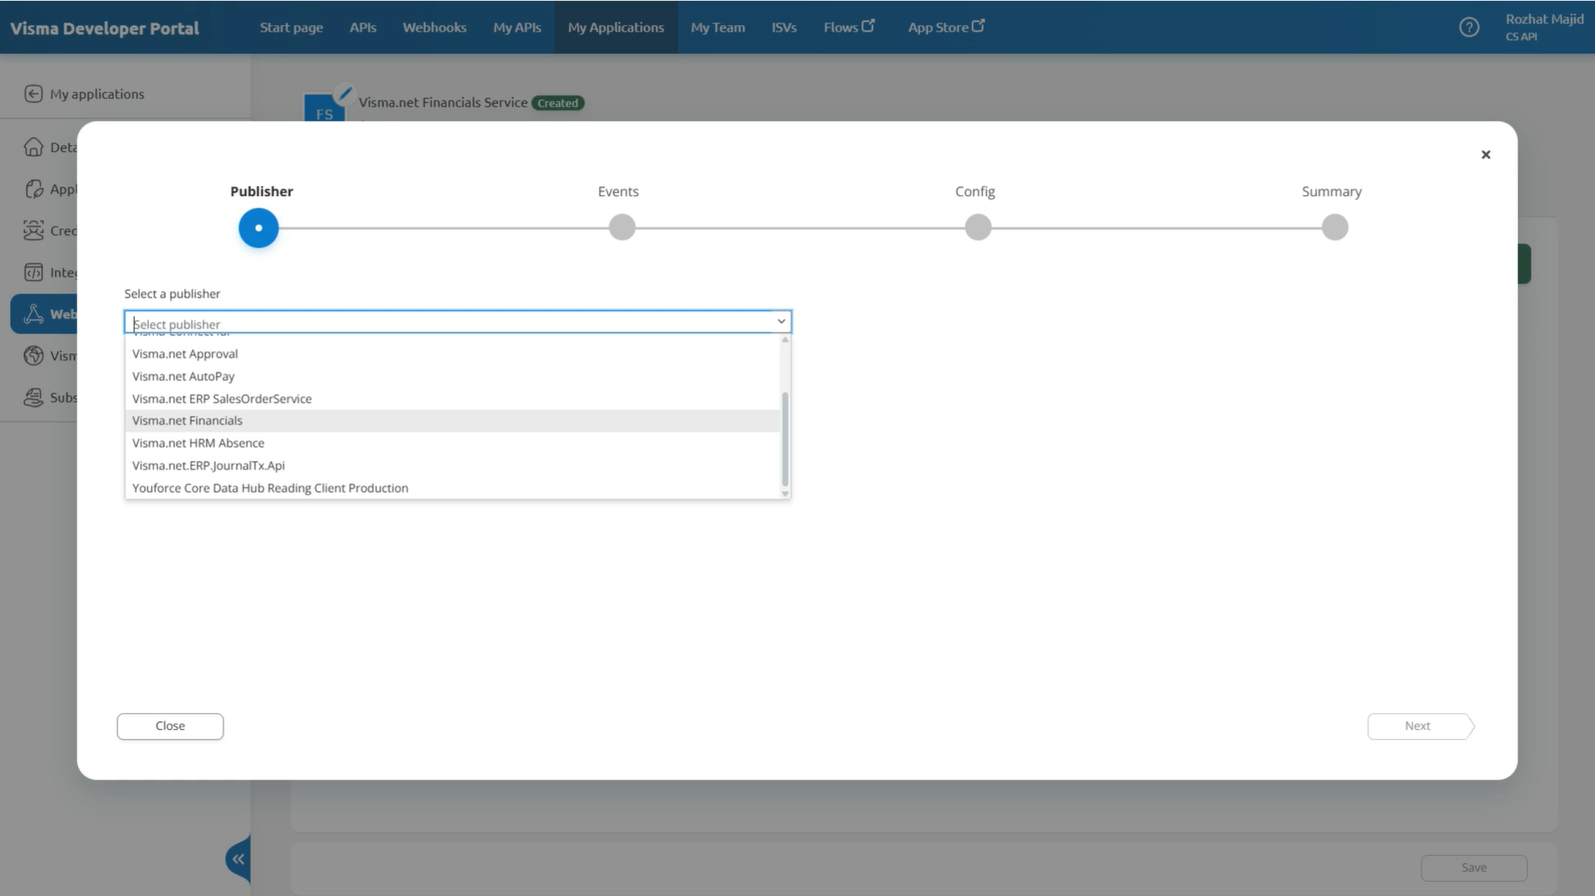
- Publisher will list all the API´s in the Developer Portal with webhook support. Choose the correct publisher for your application.
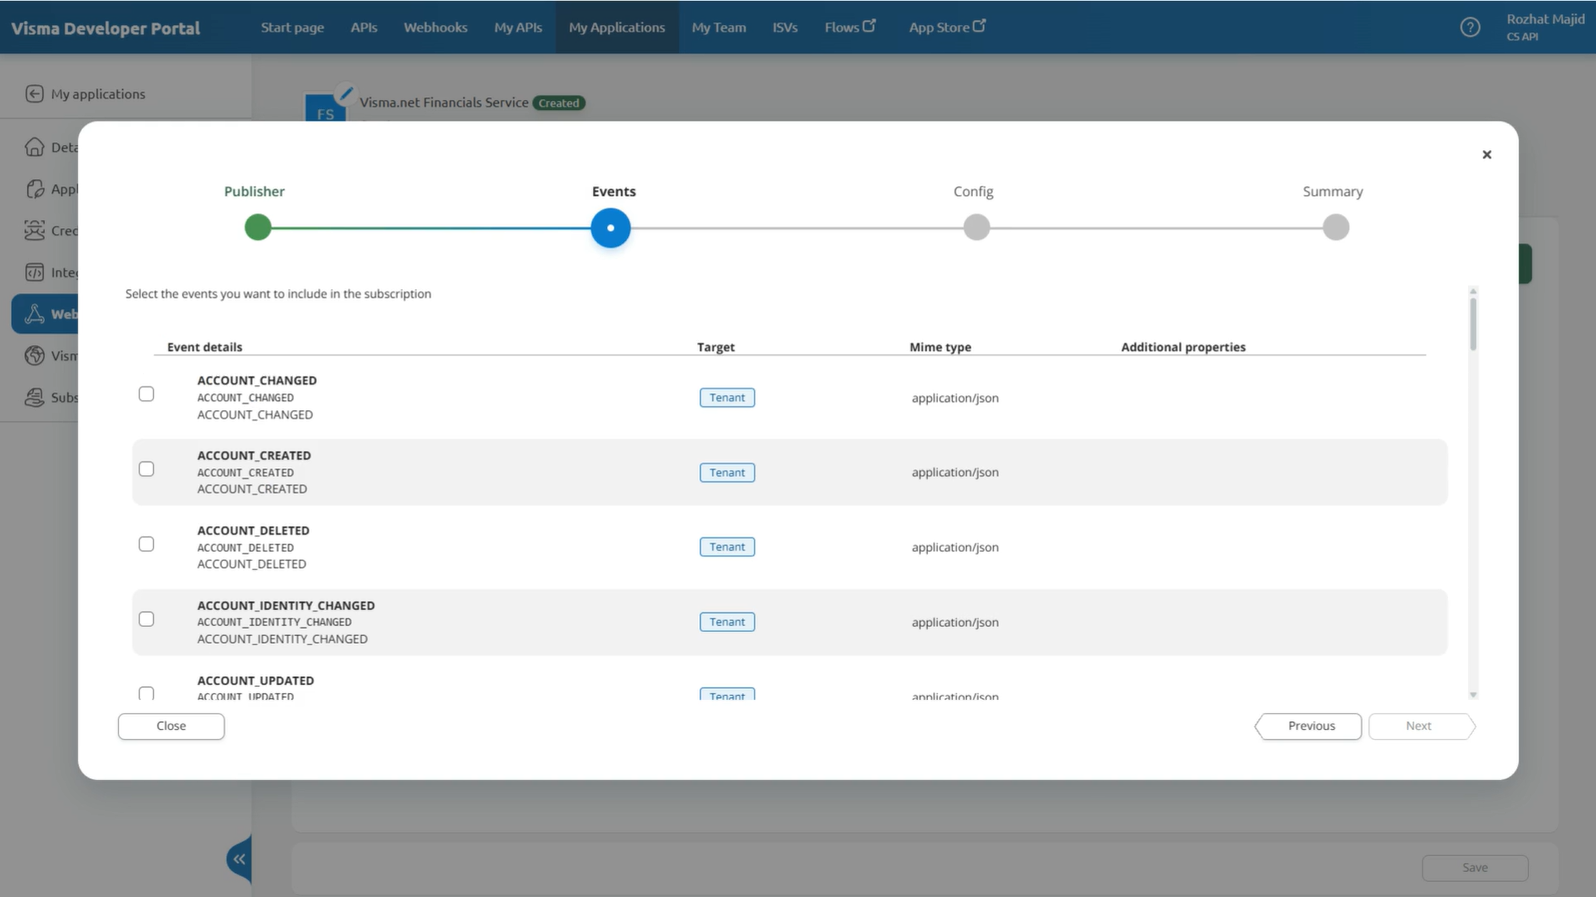
- Select the event type you want to subscribe to.
- Add the webhook URL, which is the endpoint in your system that will receive the notifications.
> [!TIP]
> When configuring your webhook subscription, avoid selecting a specific tenantID initially. Leaving the tenant field at default ensures your webhook can receive events from all tenants your application has access to.
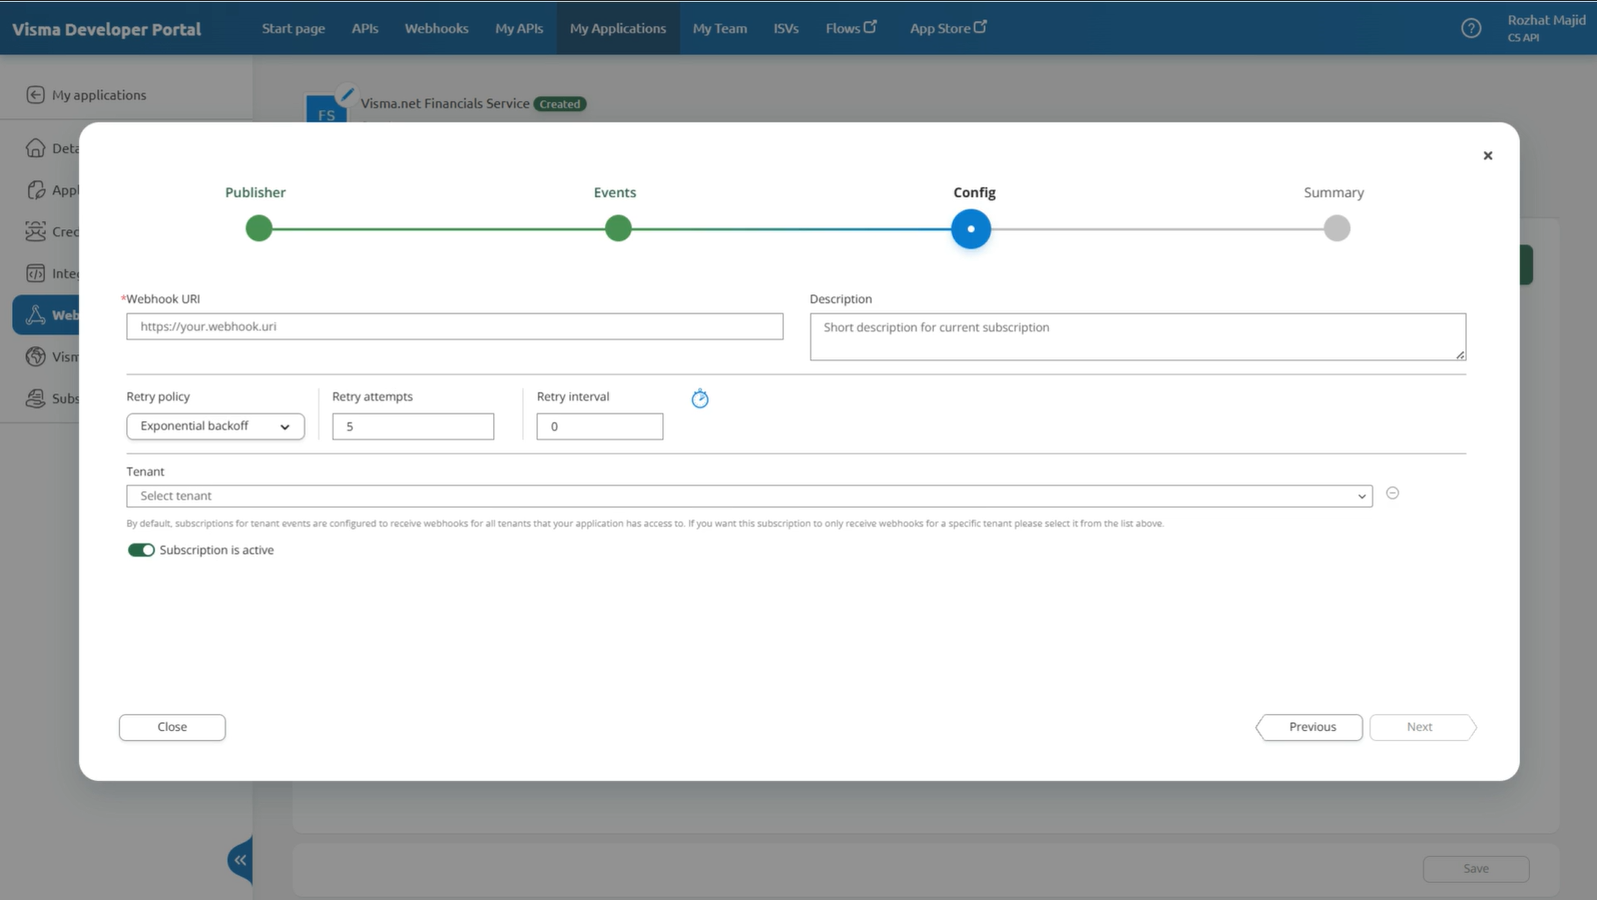
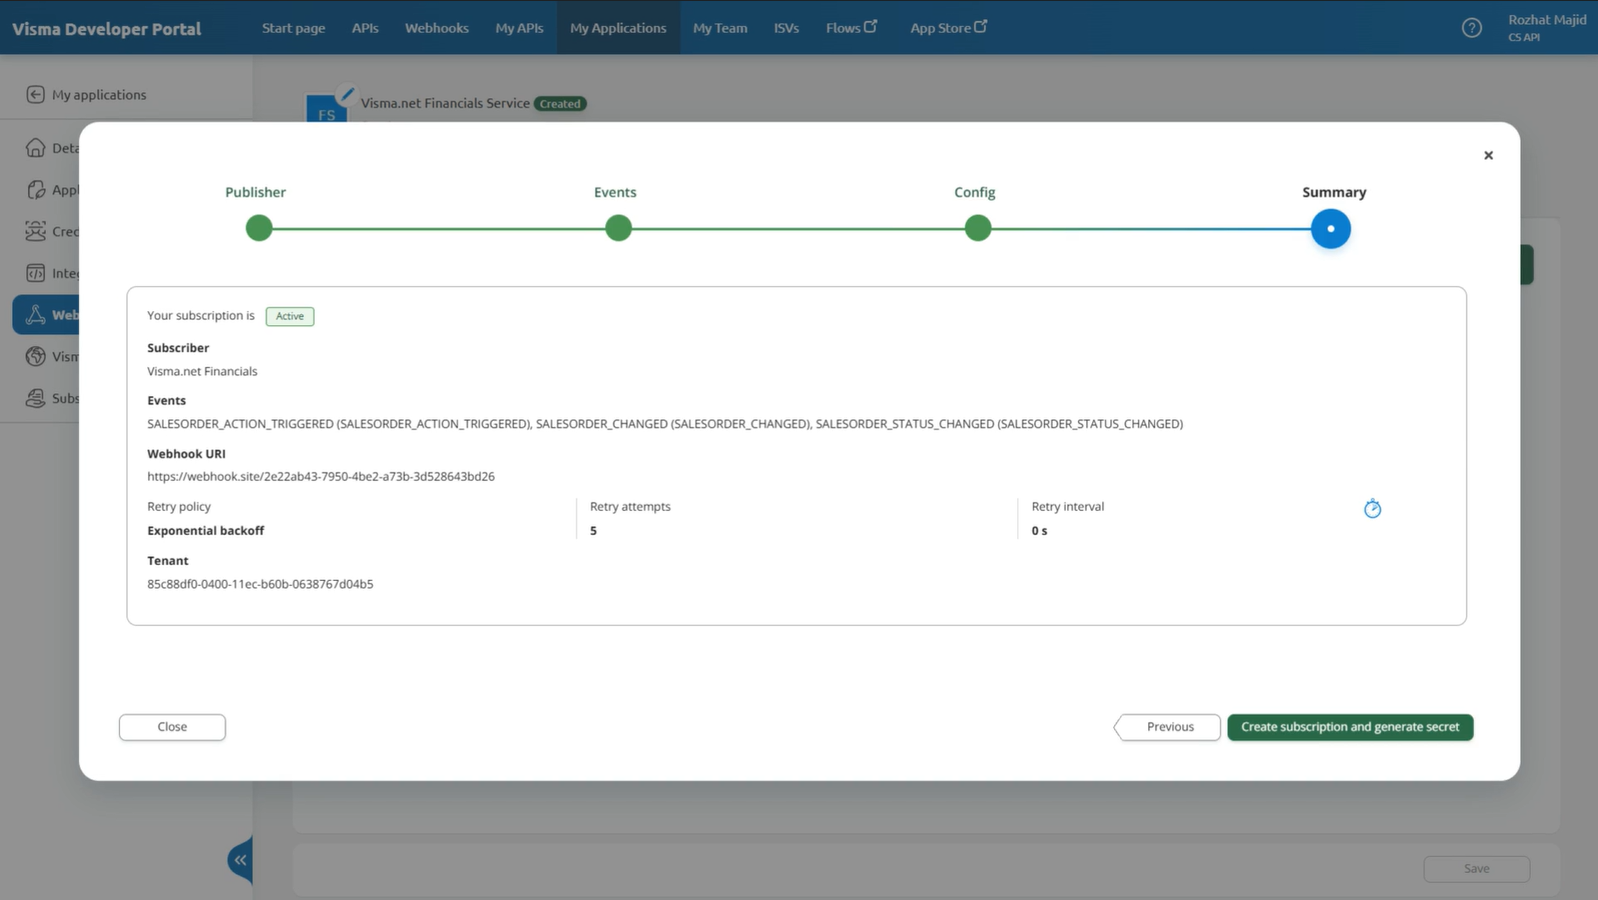
4. **Finalizing Subscription**
- Once you've set your **webhook URL** and left the **tenant field as default**, click **Next** to create your subscription and generate your webhook secret.
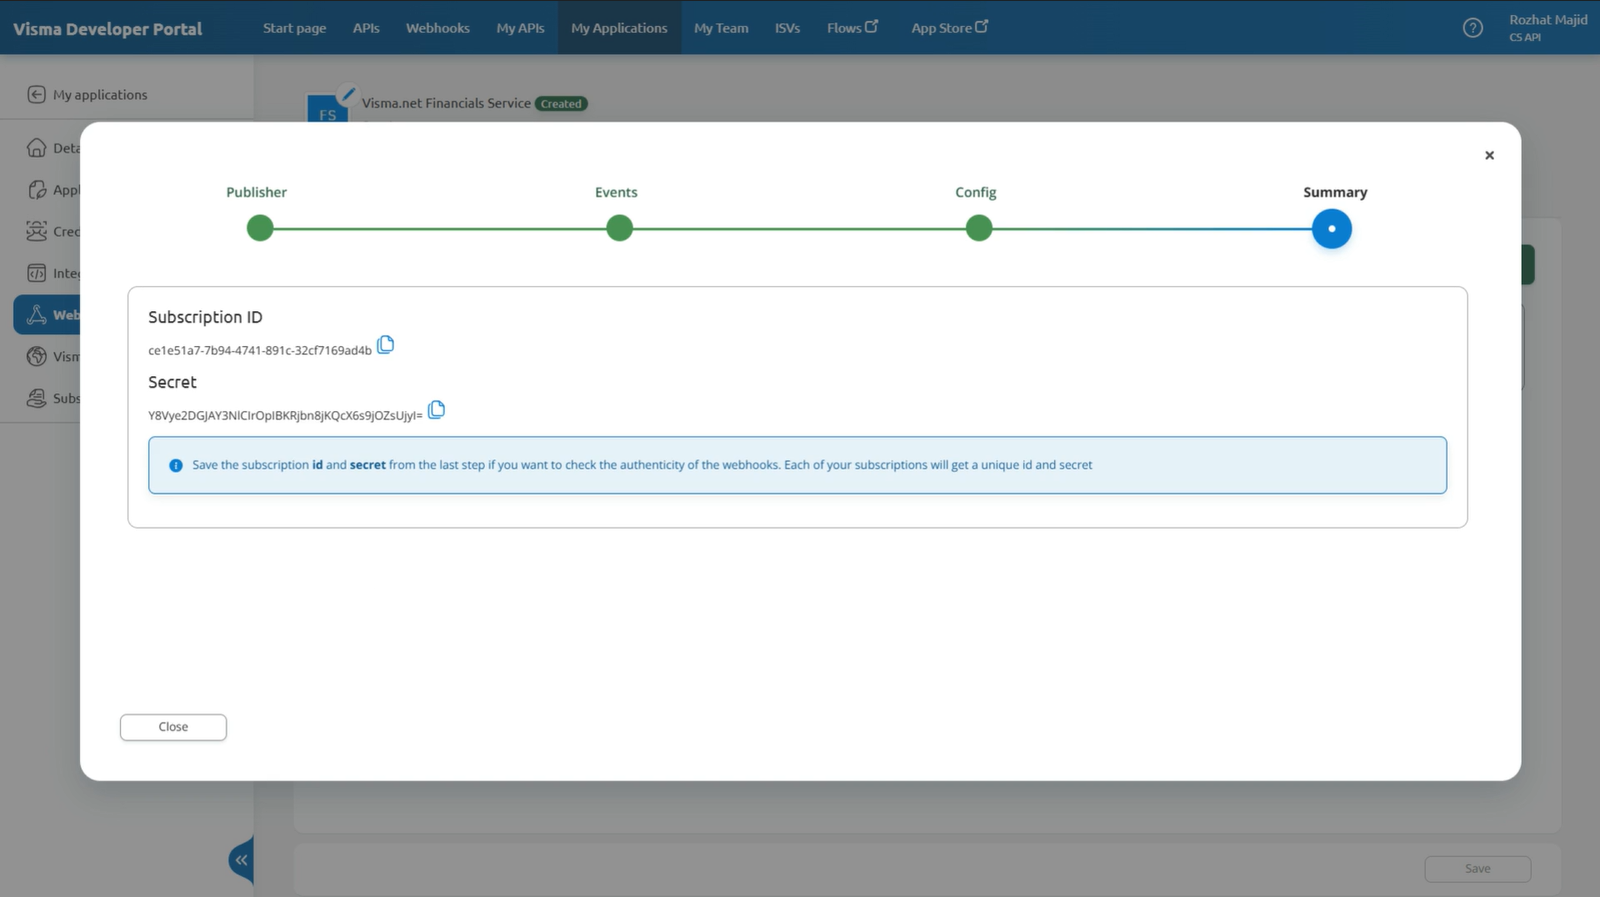
5. **Storing Your Secret**
- A signature key will be generated. Store this securely in a key vault or an environment variable.
- You'll need it to validate messages from the ERP webhook service by hashing the utf-8 message with the HMAC SHA-256 algorithm, and encoding it with base64 to compare with the signature sent in the header.
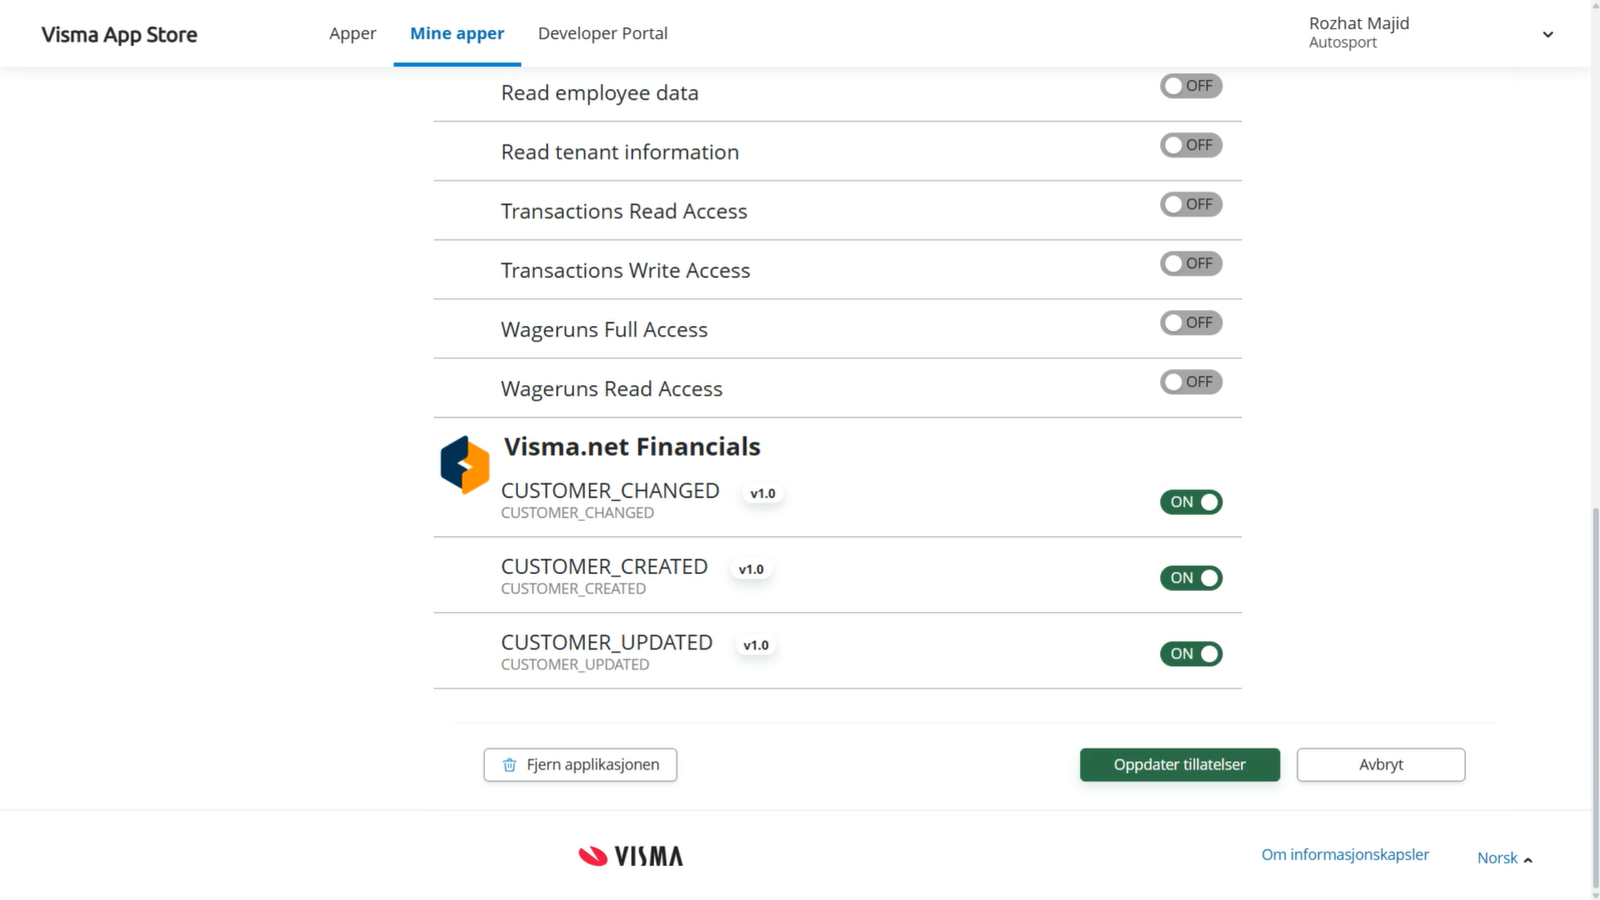
6. **Tenant Approval**
- Tenants that have granted access to your application need to approve webhook scopes for the subscription to receive webhooks.
- This can be done by navigating to the Visma App Store and granting permission at the bottom of the application page.
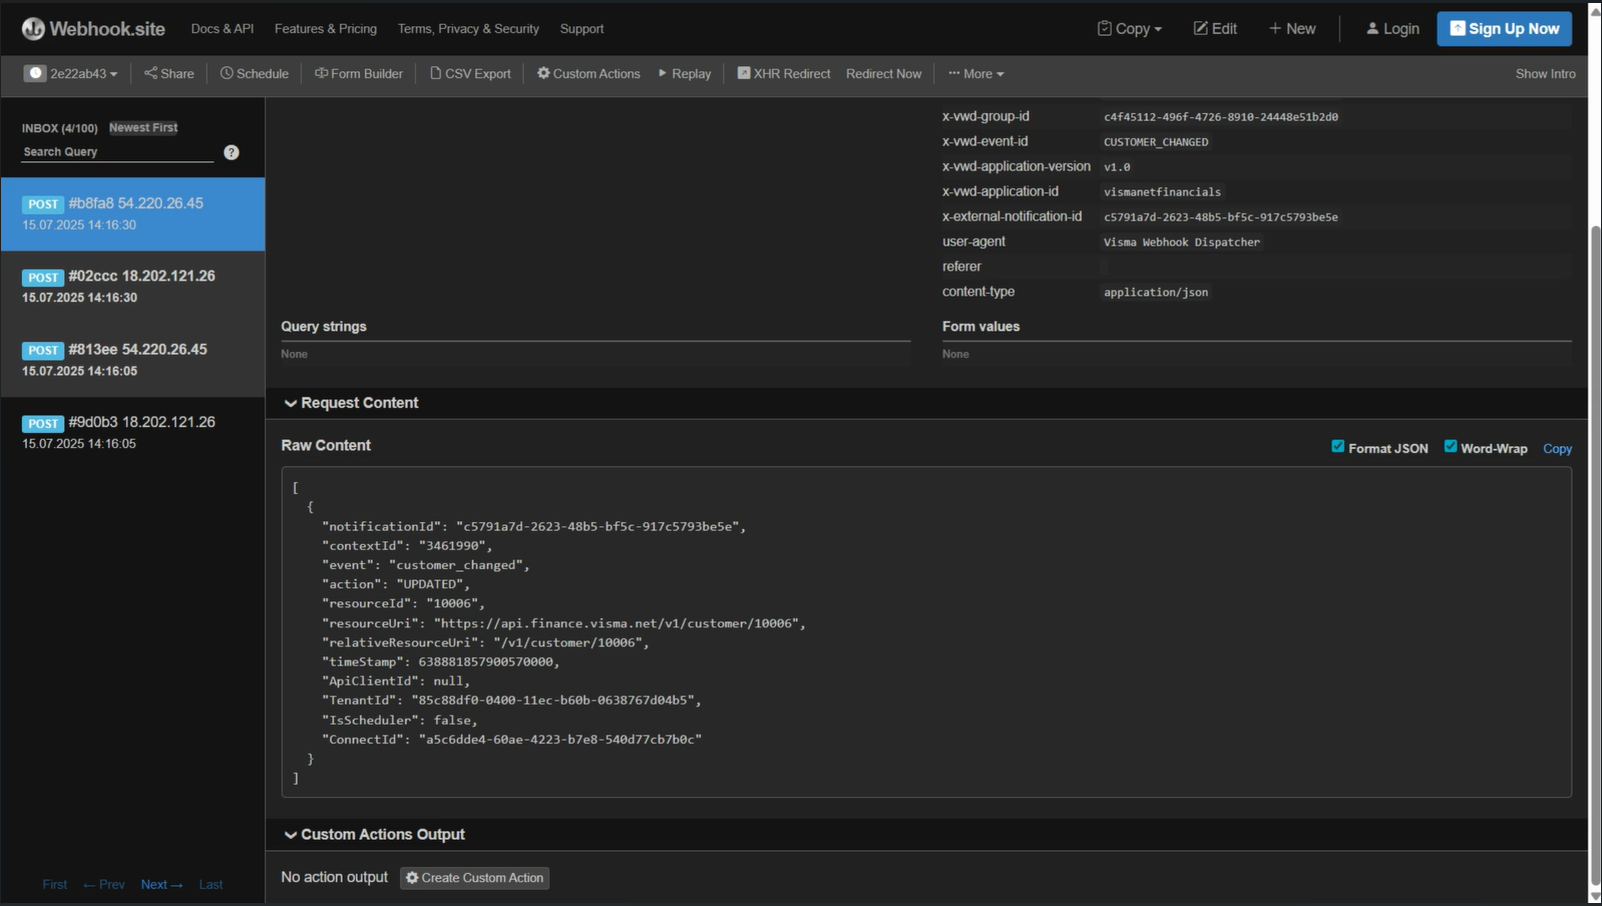
## Testing Your Webhook
After setting up your webhook, you can test it´s functionality. In this example we have created a subscription for the event `Customer_changed`
1. **Make a change on a Customer**
- Update a customer's name in the system.
> [!IMPORTANT]
> Ensure the webhook notification checkbox is selected in the UI.

1. **Verify the Webhook Trigger**
- Once the change is made, the webhook is triggered and the data is sent to Webhook.site.
- The webhook should capture all relevant information, confirming that the integration works correctly by delivering real-time updates from Visma Net ERP.
- This confirms that the webhook integration is working correctly, capturing and delivering real-time updates from Visma net ERP to your desired endpoint.