Setup webhooks for your application
/vismanetapi/webhooks/setup-webhooks-for-your-application
section
Learn how to setup webhooks for your application in Developer Portal
2026-02-05T13:28:34+01:00
# Setup webhooks for your application
Learn how to setup webhooks for your application in Developer Portal
> [!TIP]
> [Additional guide can also be found on the the webhook course at Visma Learning Universe](https://www.vismalearninguniverse.com/learn/courses/1535/vismanet-erp-webhooks?hash=16e8c684557cdcb32685a9aa20551ad2241ed4ac&generated_by=37643)
## Subscribing to Webhooks
To begin using webhooks in Visma Net ERP, we need to create a subscription to webhook events for your application in the Developer Portal.
Follow the steps below to get started.
1. **Log in to the [Visma Developer Portal](https://oauth.developers.visma.com/service-registry)**
- Navigate to **My Applications**.
2. **Find Your Application**
- Locate the application that is integrated with the ERP API.
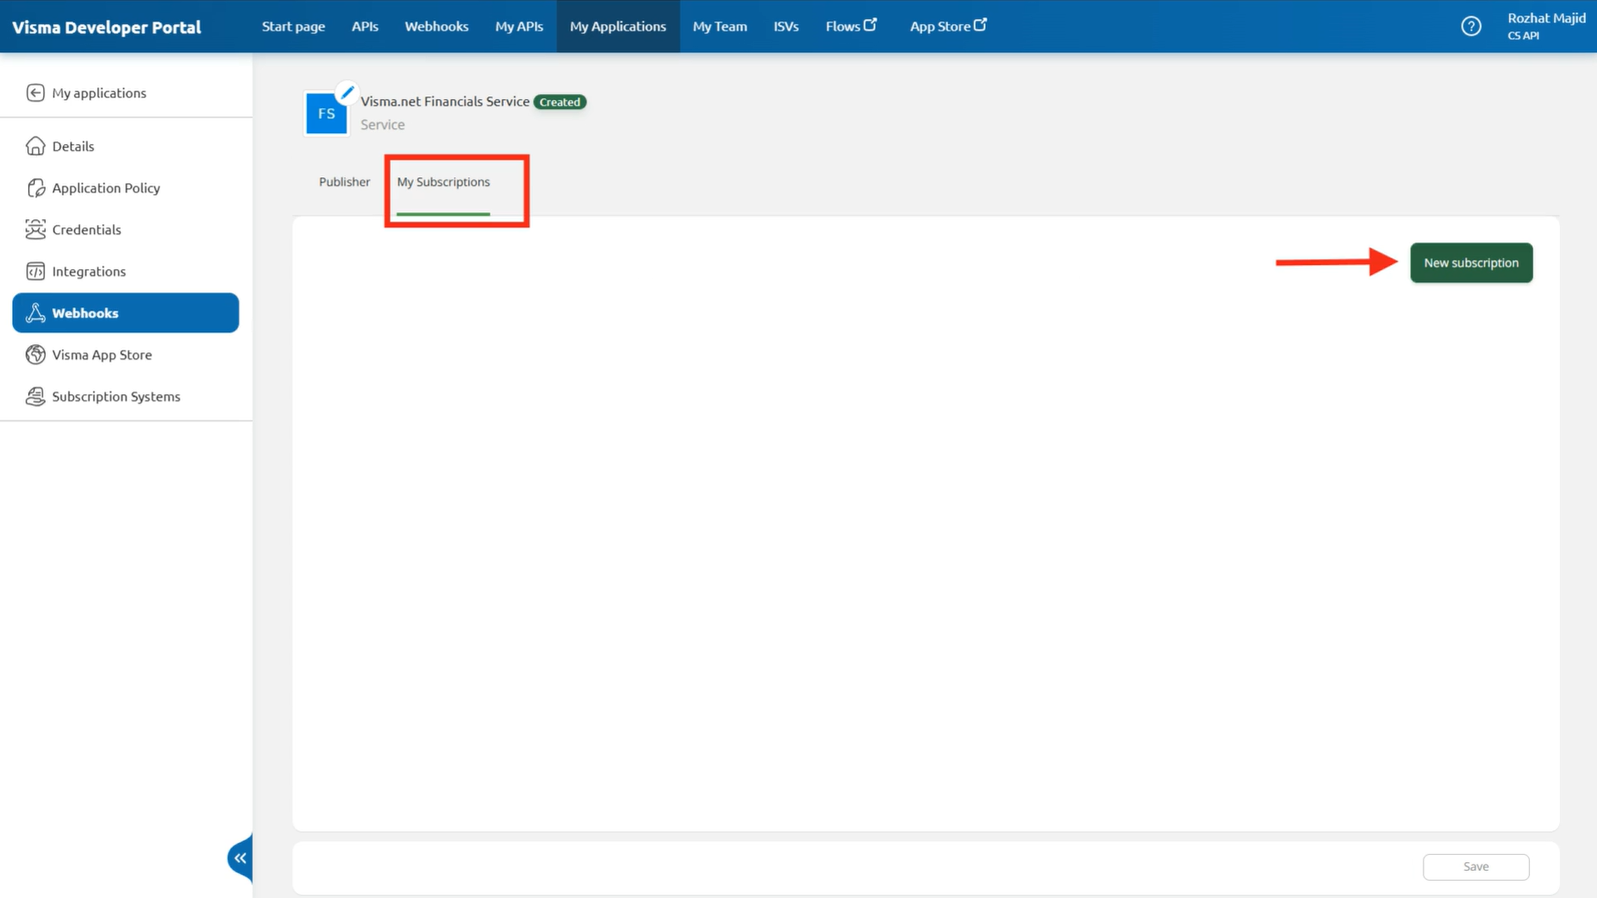
3. **Create a New Subscription**
- Go to **My Subscriptions** and click the **New Subscription** button.
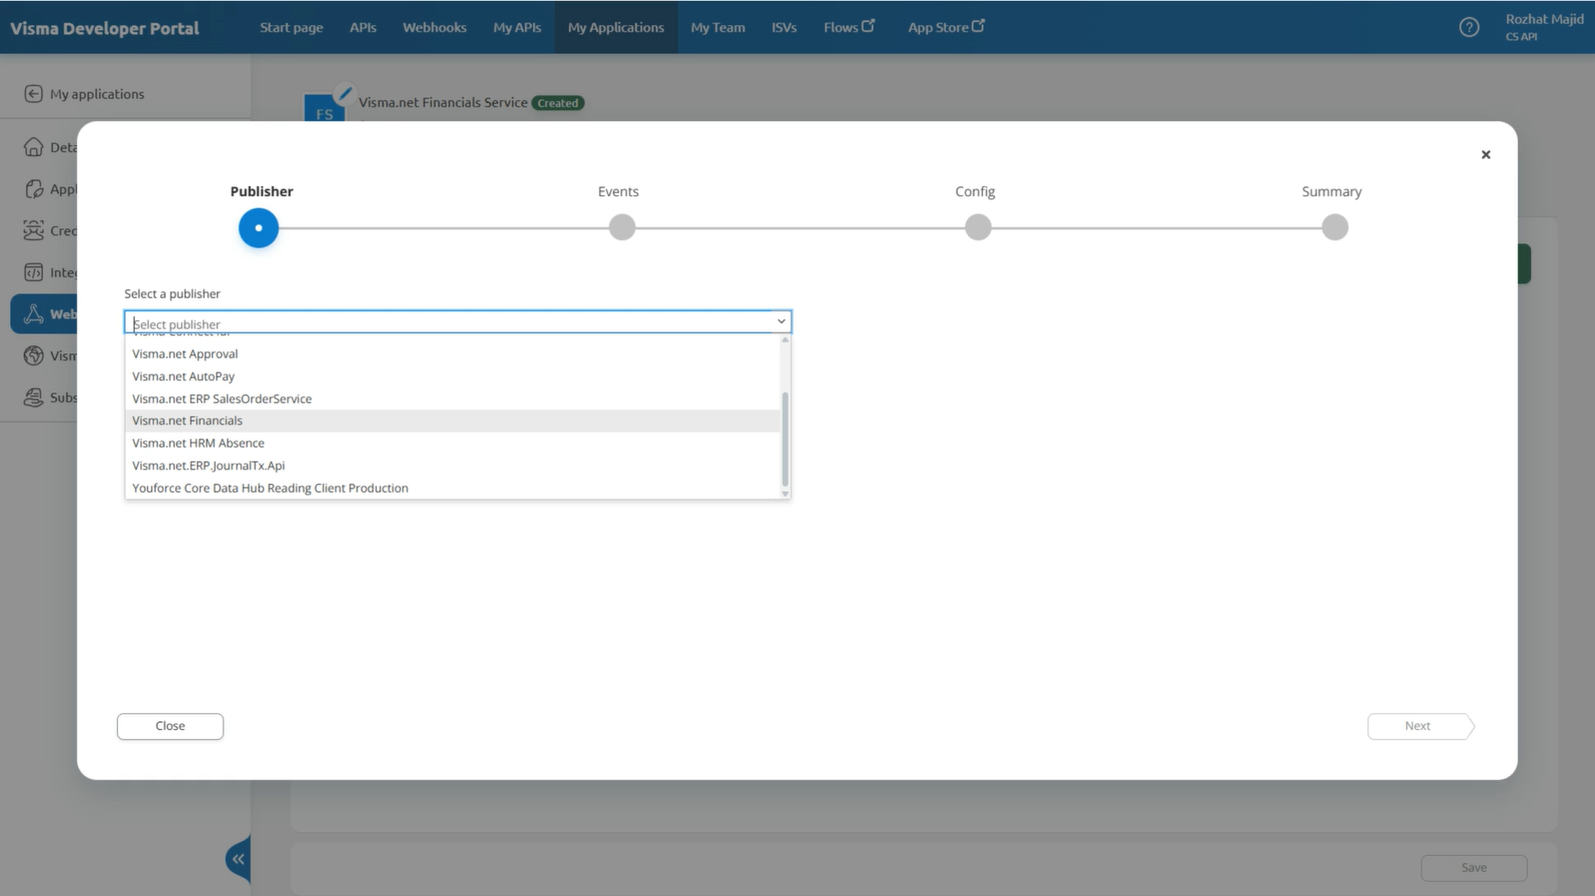
- Publisher will list all the API´s in the Developer Portal with webhook support. Choose the correct publisher for your application.
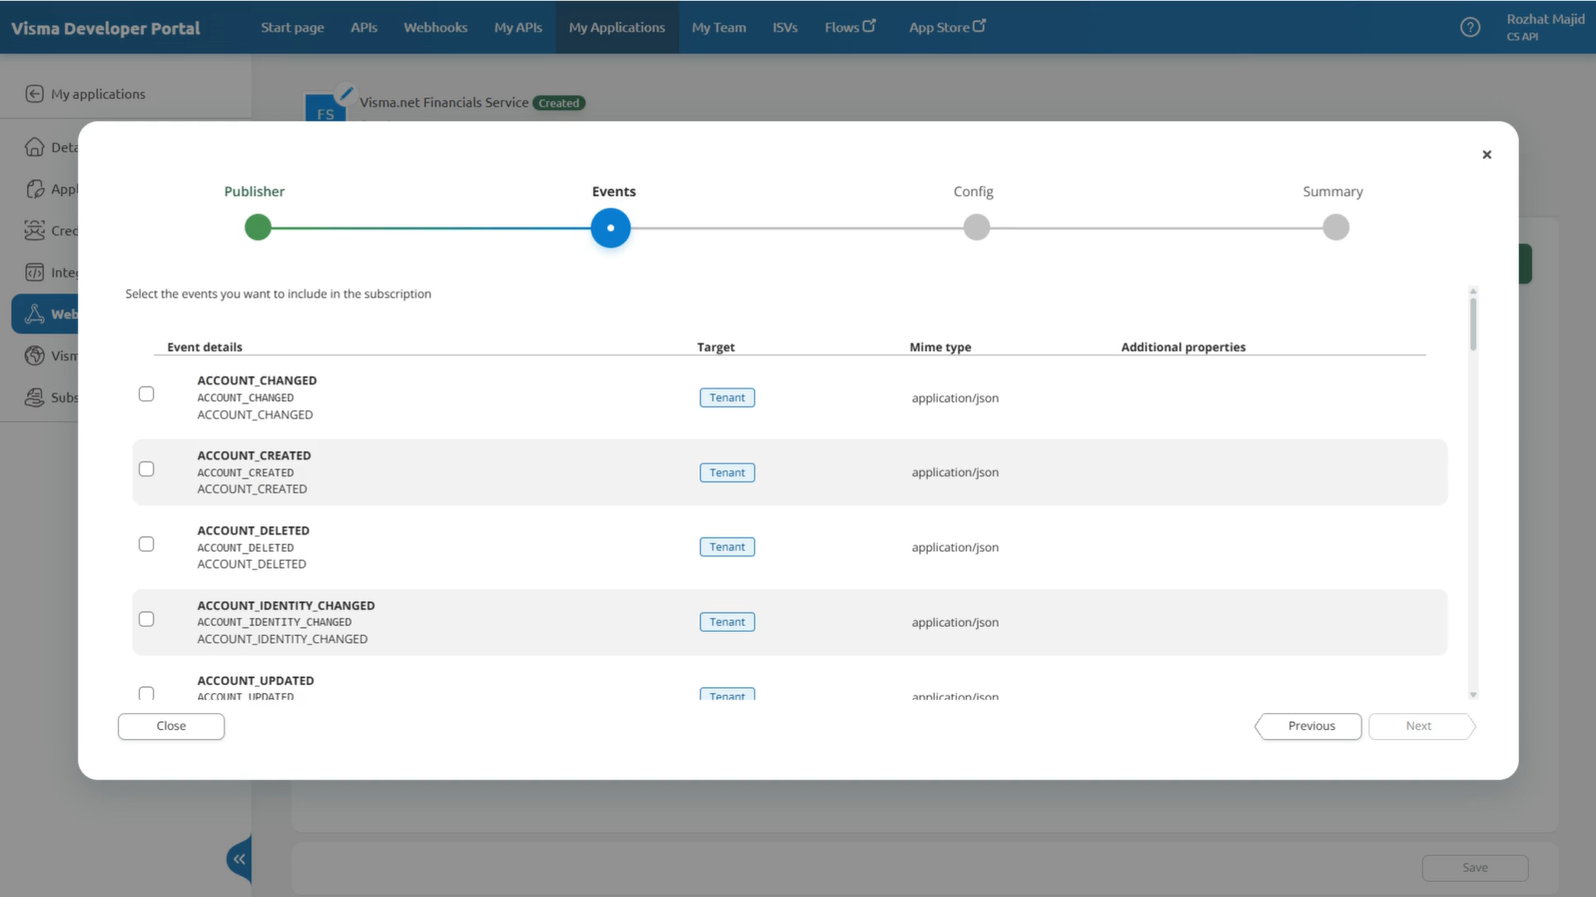
- Select the event type you want to subscribe to.
- Add the webhook URL, which is the endpoint in your system that will receive the notifications.
> [!TIP]
> The first time you set up a webhook, the tenantId field will be empty, even though there are Visma Net companies connected to the Application in the Developer Portal. This happens because the company has not yet accepted the specific webhook scopes in the App Store.
>
>When you configure your webhook subscription, do not select a specific tenantID at first. If you leave the tenant field at default, your webhook can receive events from all tenants your application has access to.
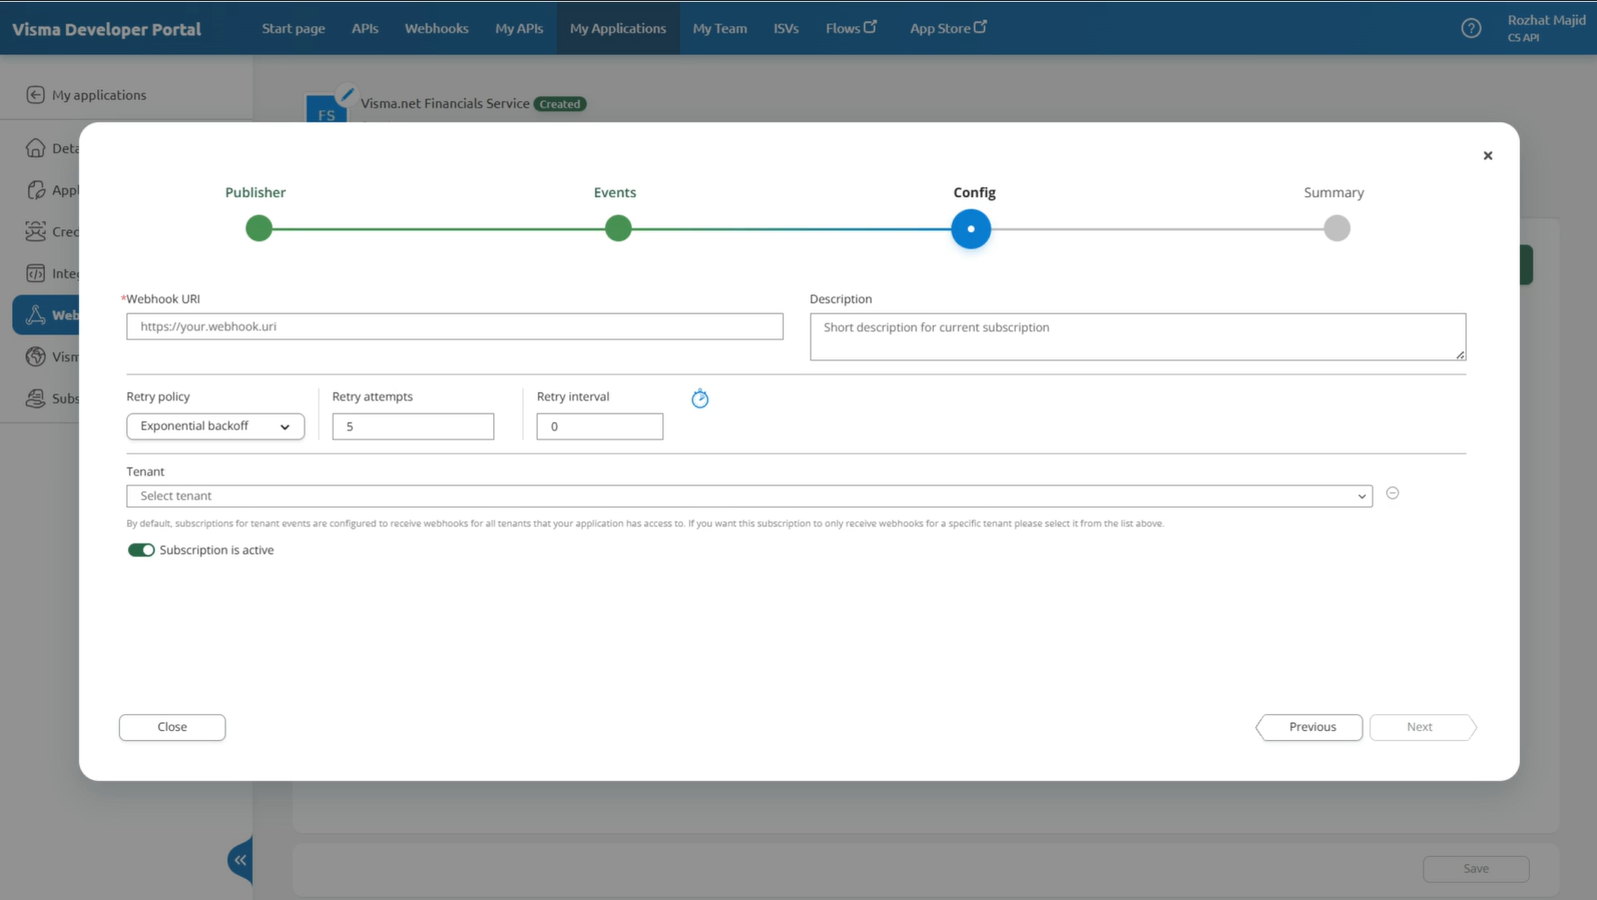
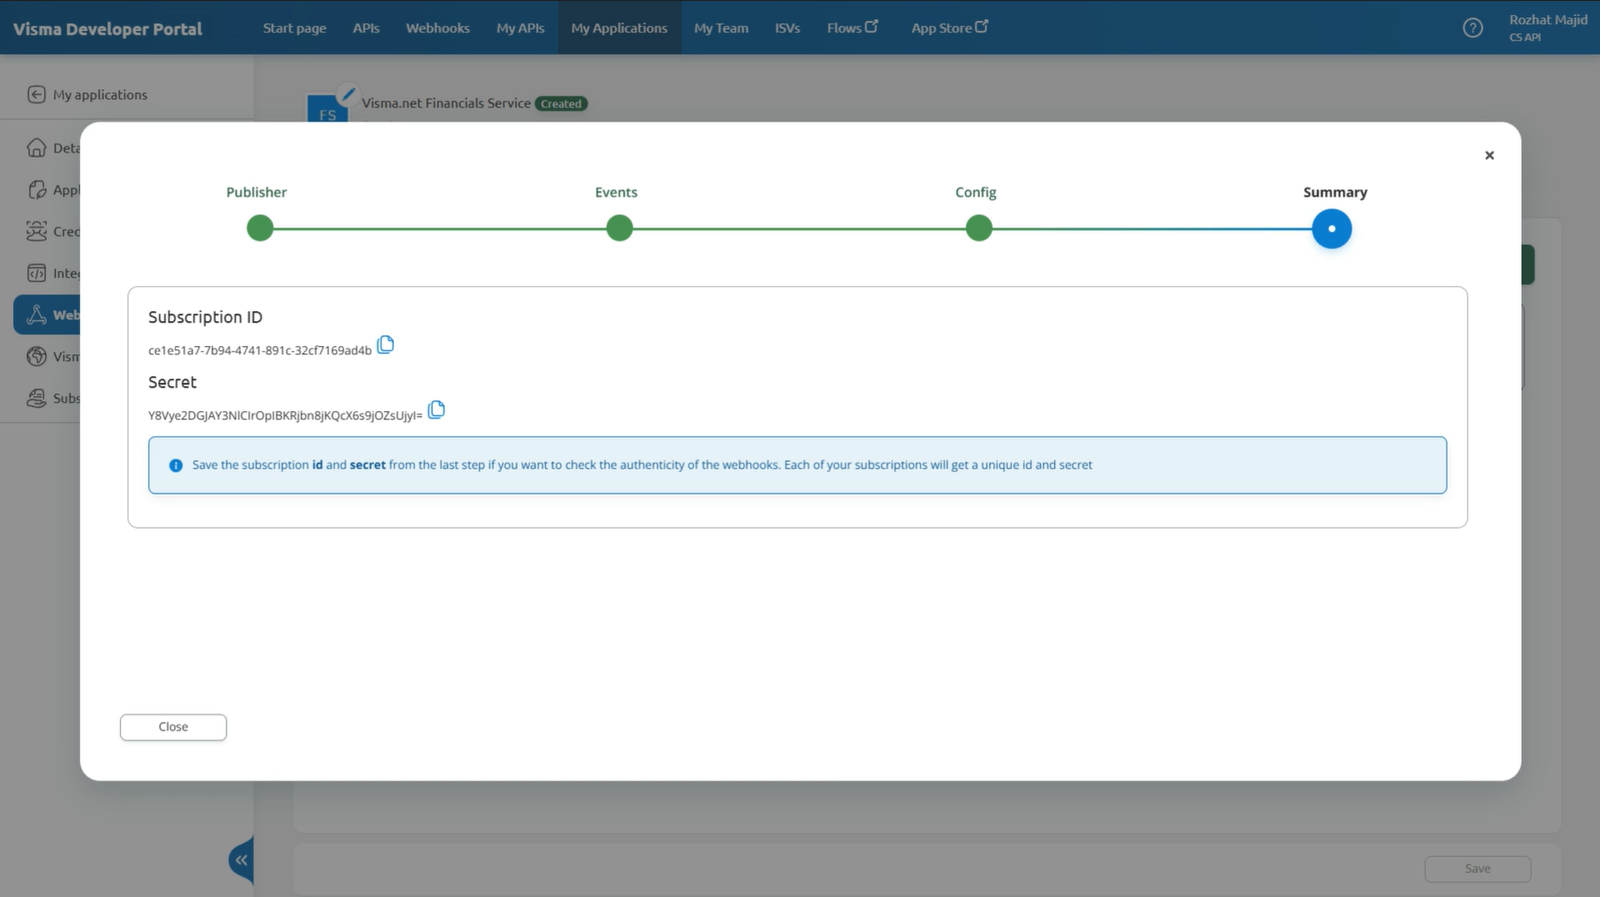
4. **Finalizing Subscription**
- Once you've set your **webhook URL** and left the **tenant field as default**, click **Next** to create your subscription and generate your webhook secret.

5. **Storing Your Secret**
- A signature key will be generated. Store this securely in a key vault or an environment variable.
- You'll need it to validate messages from the ERP webhook service by hashing the utf-8 message with the HMAC SHA-256 algorithm, and encoding it with base64 to compare with the signature sent in the header.
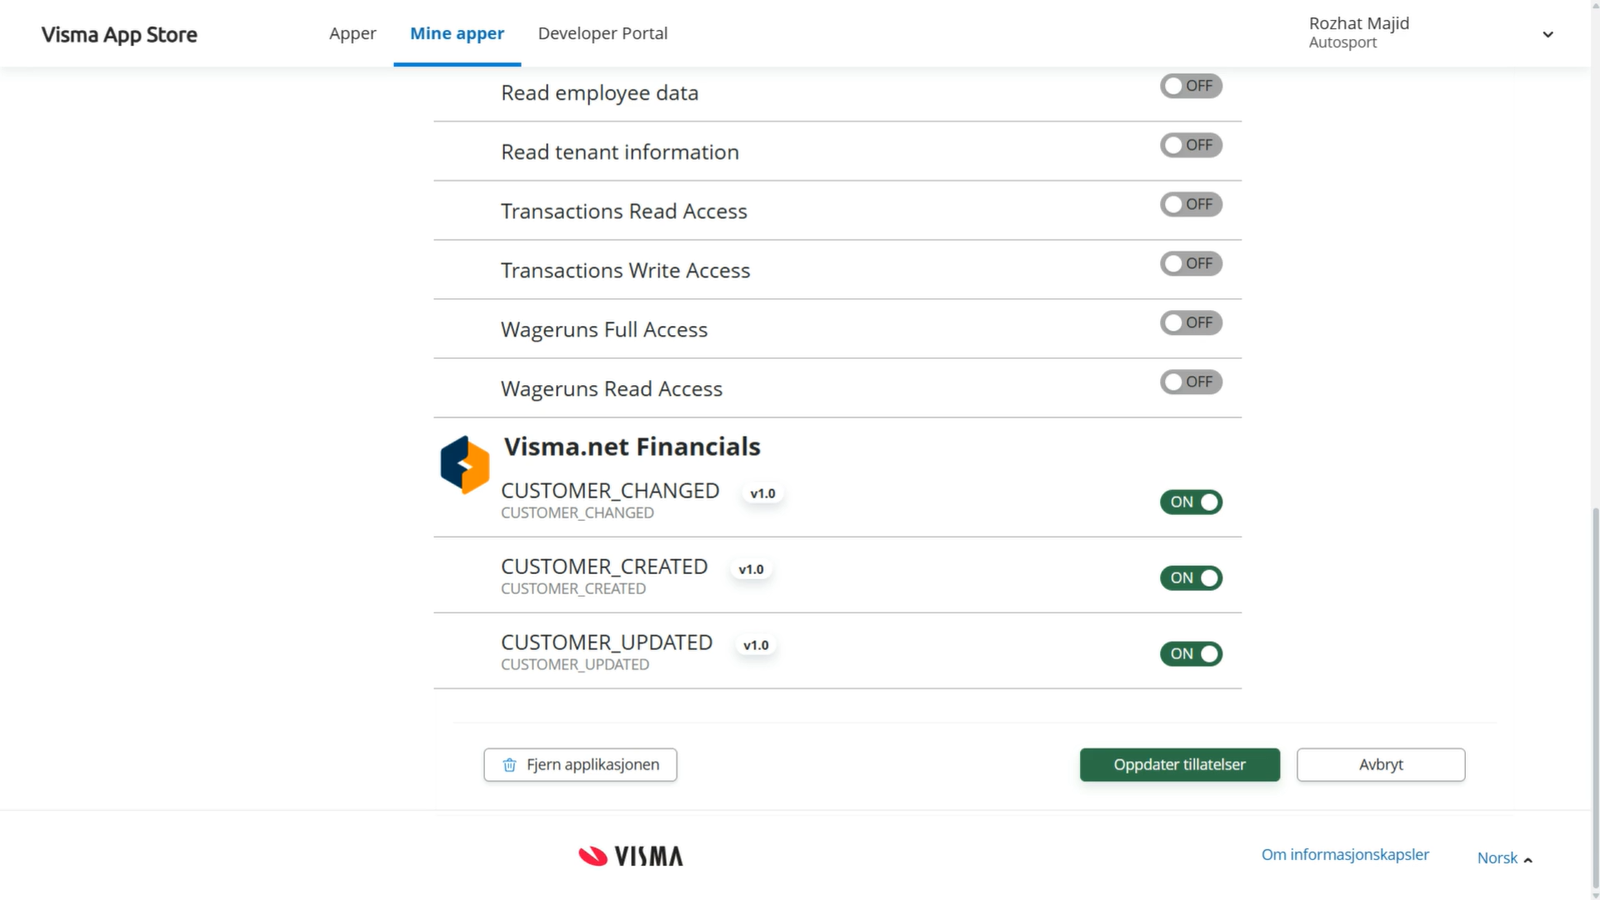
6. **Tenant Approval**
- Tenants that have granted access to your application need to approve webhook scopes for the subscription to receive webhooks.
- This can be done by navigating to the Visma App Store and granting permission at the bottom of the application page.
## Testing Your Webhook
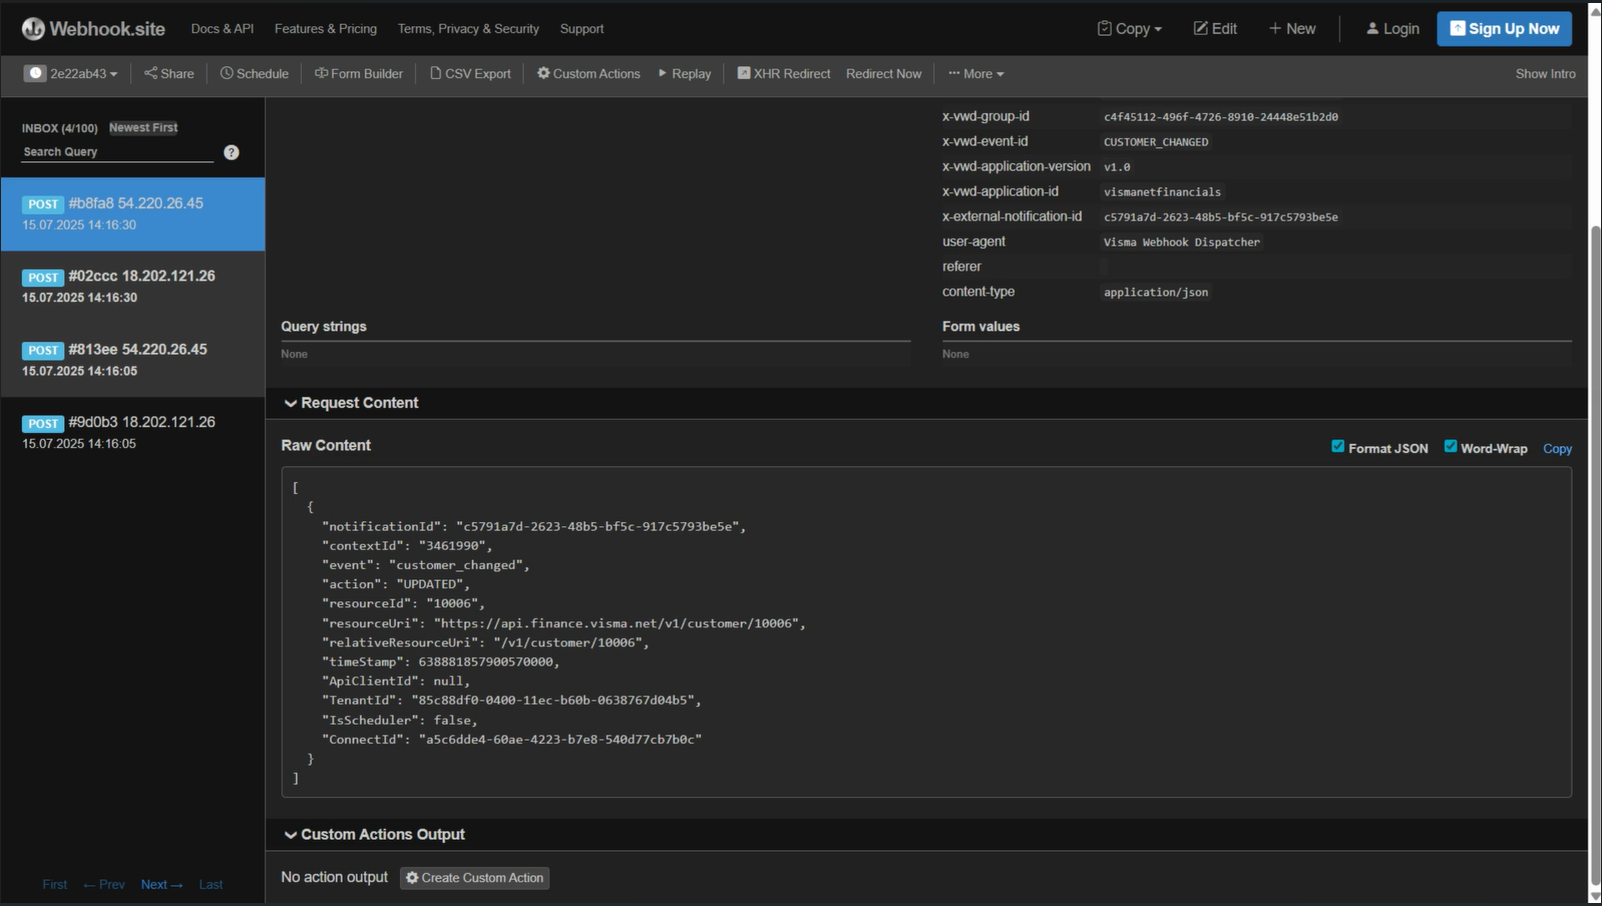
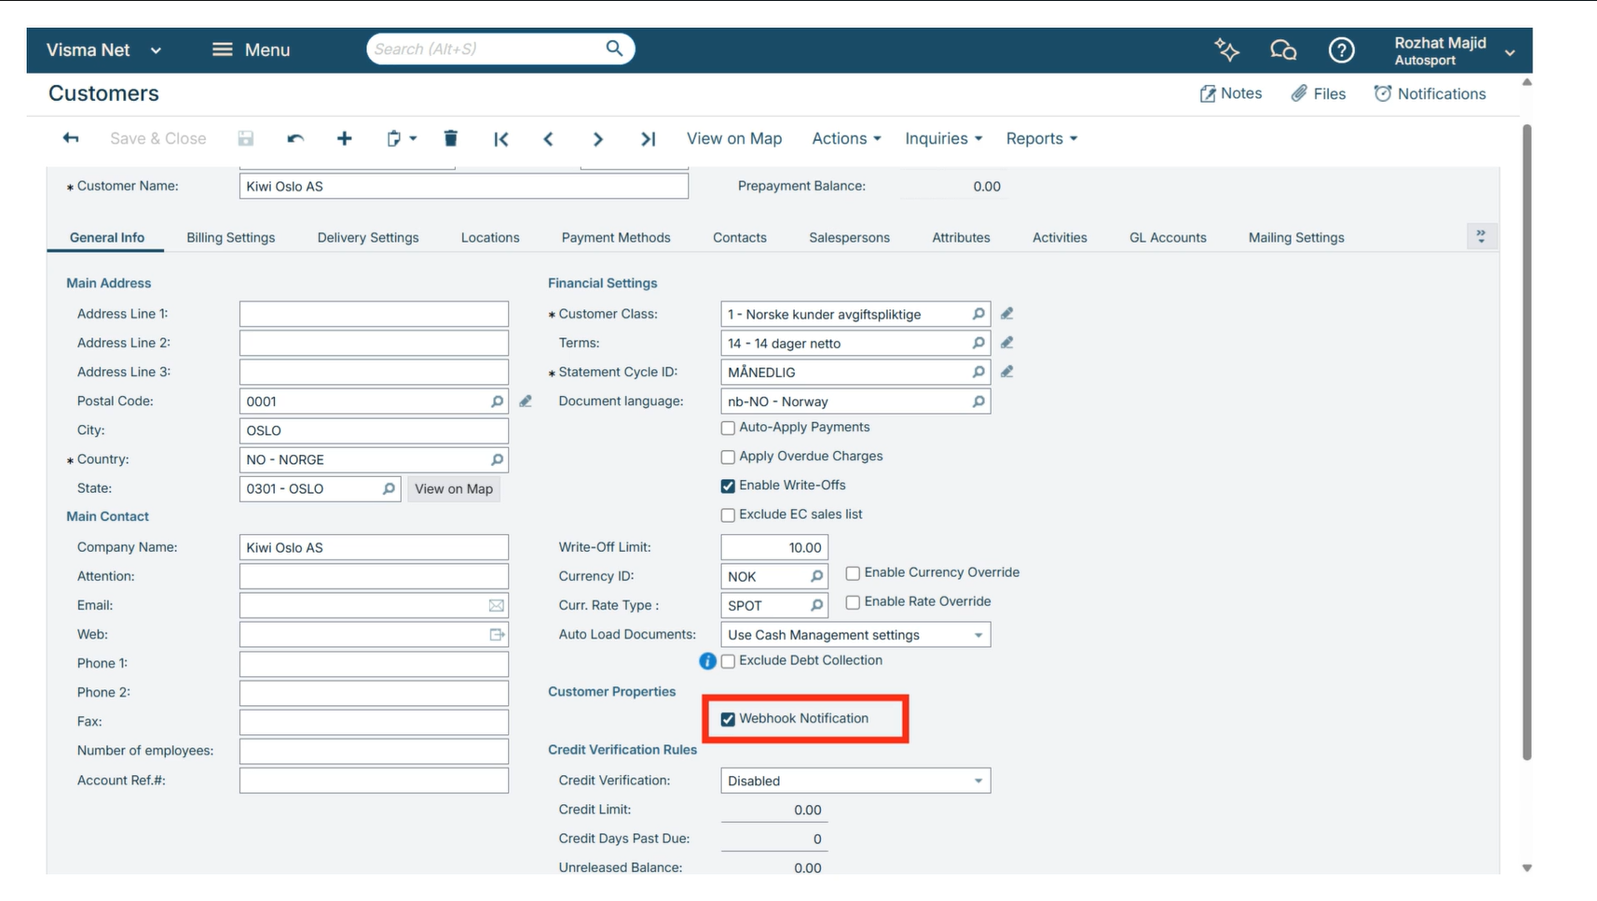
After setting up your webhook, you can test it´s functionality. In this example we have created a subscription for the event `Customer_changed`
1. **Make a change on a Customer**
- Update a customer's name in the system.
> [!IMPORTANT]
> Ensure the webhook notification checkbox is selected in the UI.
1. **Verify the Webhook Trigger**
- Once the change is made, the webhook is triggered and the data is sent to Webhook.site.
- The webhook should capture all relevant information, confirming that the integration works correctly by delivering real-time updates from Visma Net ERP.
- This confirms that the webhook integration is working correctly, capturing and delivering real-time updates from Visma net ERP to your desired endpoint.