April 2023
With Roles and Labels it is possible to distribute specific reports to specific users.
Report labels are selected for each report and role, then users are added to roles.
Which reports the user will have access to depends on the user's role.
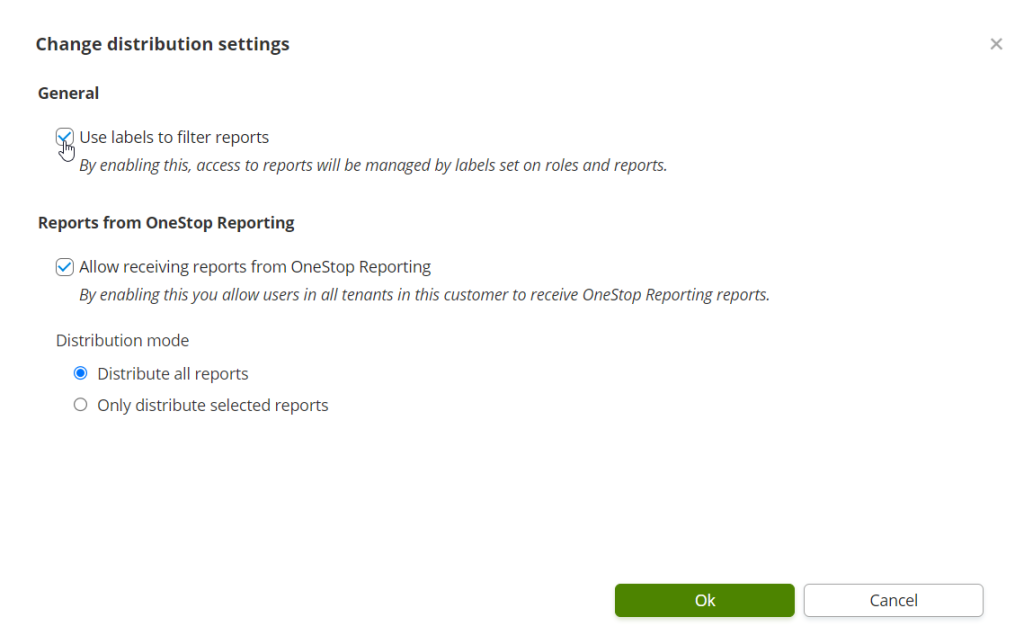
Distribution setting: Use labels to filter reports
NOTE: Only administrators at the top (customer) level are able to edit this setting.
To turn on the functionality for Roles and Labels, the setting must be selected at the customer level. Before the setting is selected, Roles and Labels will have no effect.
In this way, you can create roles, add users to roles and add labels to reports without it affecting your OneStop Reporting environment before you are ready.
NOTE: If labels are not added to reports and users are not given roles, reports will not be available for users if the setting is selected.
Change Distribution setting
- Go to the New Administration module.
- Click the top level in the organization tree.
- On the Customer settings tab, click ✏️ to edit Distribution settings.
- Select ✅ the Use labels to filter reports checkbox.
Reporting Labels
Reports distributed from OneStop Reporting NO
All reports distributed from OneStop Reporting have predefined labels which cannot be changed. These labels are determined by Visma Software in the country where you purchased OneStop Reporting.
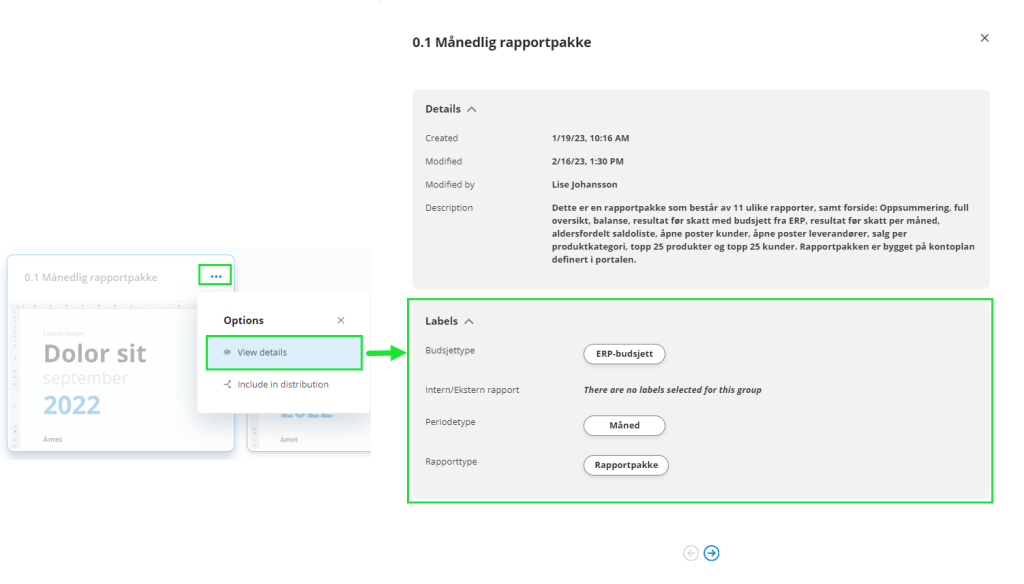
View labels set on reports
- Go to Reporting or Distribution


- Click Options on a report template

- Click View details.

Add labels to Reports
NOTE: Only administrators can add labels to reports. The Administrator must be an administrator at the same level or a higher level than the report is distributed.
Consequently, if a report is only distributed to one tenant, a tenant administrator can add labels to the report, if a report is distributed to a group, a group administrator can add labels, and if a report is distributed at top level only a top level administrator has access to add labels.
To add labels to reports;
- Go to Reporting or Distribution


- Click Options.

- Click View details.
- Click ✏️ Edit.
- Add labels and click Save.
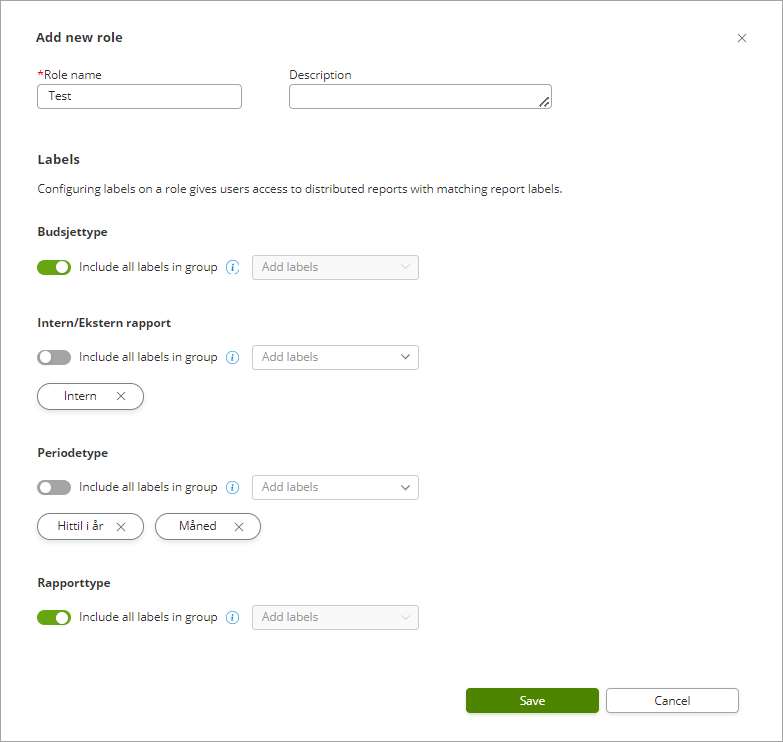
Roles for Distribution
NOTE: Only top-level administrators can create roles for distribution.
Create roles
- Go to the New Administration.
- Click the top level in the organization tree.
- Click Roles.
- Click Actions.

- Click New Role.
- Give the role a suitable Name.
- Add Labels. NOTE: By turning on the Include all… switches
 , you can select all labels.
 - Click Save.
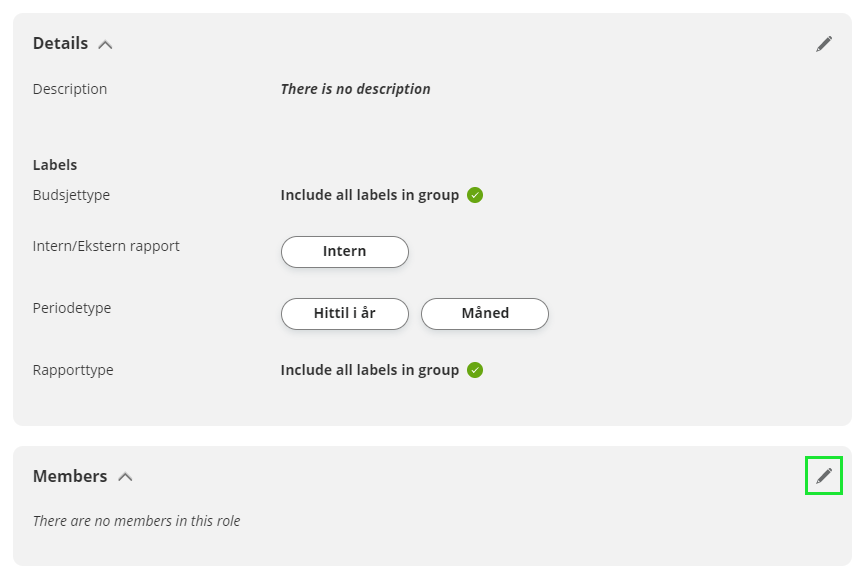
Add users to Roles
NOTE: Administrators at all levels (top, group, or tenant) can add users to roles.
- Go to the New Administration
- Go to the level in the organization tree where you want to add users.
- Click Roles.
- Click on an existing role.
- Under Members, click ✏️ Edit.
- Select the users to add by searching in the Search bar.
- Click the user's name.
- Click Save.
Which reports will a user have access to based on the labels of the report and the role?
For a report to be visible to a user, the labels of the user’s role must at least have one matching label in all of the four types. The different types are: Budget type, Internal/external, Period type, and Report type.
An example is shown in the picture below.
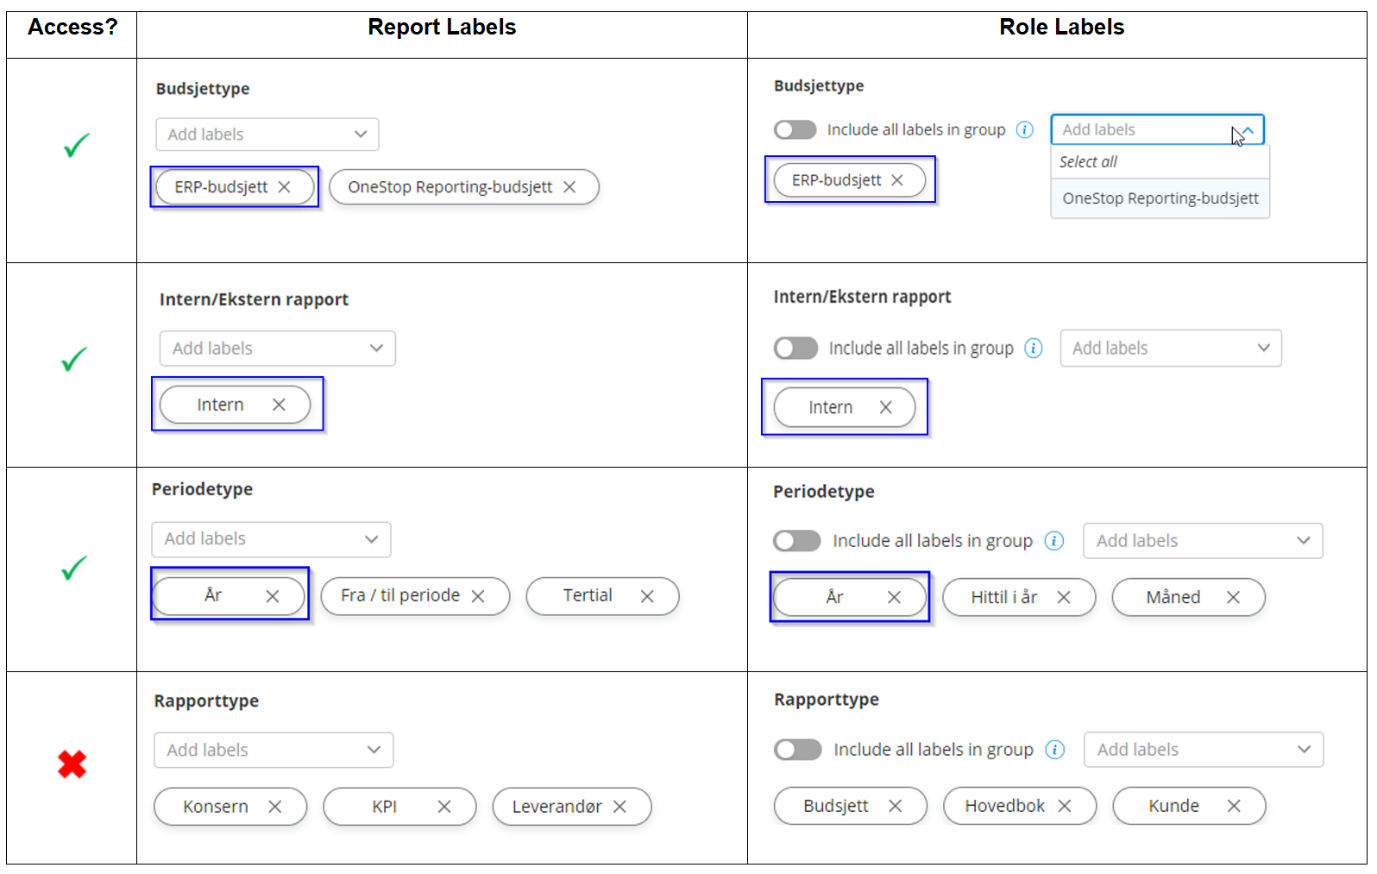
In this example, the user will not have access to the report as none of the labels match the report type. If one of the labels Budsjett, Hovedbok, or Kunde is added to the role, this report would be visible to the user.
Use Case example
In the picture below, a role for all sales employees in a company is created.
The reason why the particular labels and label settings are selected is explained below.
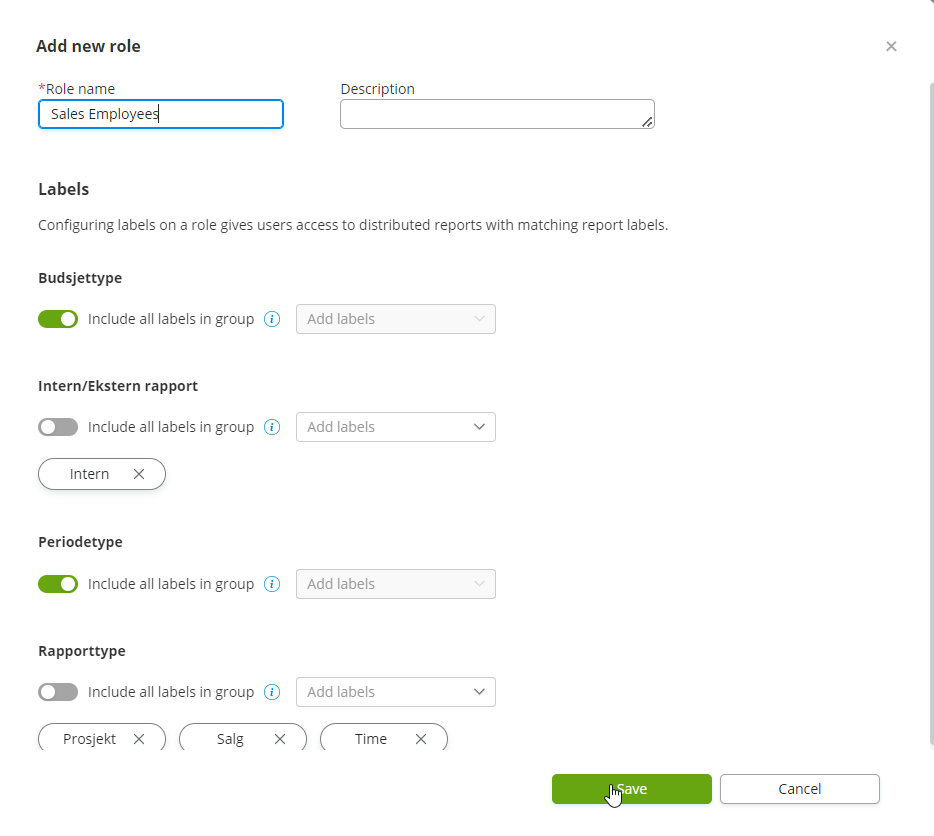
The setting Include all labels in group is selected on Budget Type and Period Type.
This is because all sales employees should have access to all reports regardless of the type of budget and periods being used. If more budget or period types are added to reports in the future, the sales employees will also have access to these as long as the reports fit the other criteria.
It is further chosen that the sales employees should only have access to reports with the labels: Internal, Project, Sales, and Hour. If more labels are added to these groups in the future, the sales employees will not automatically gain access.
We have released a new version of Report Designer. The new version contains:
- functionality for building reports with enhanced performance for Visma Business and Business NXT
- better management of deleted expressions for all integrations
- new logo.
NOTE: Remember to download the latest version of Report Designer to take advantage of new functionality.
Enhanced performance for Visma Business/Business NXT
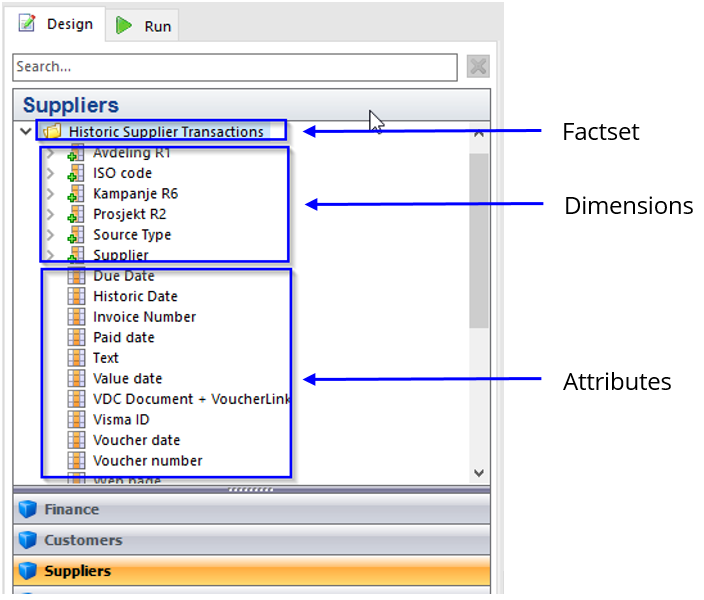
The reports with enhanced performance are built on new factsets for historical customer- and supplier transactions.
What’s New?
We have added a new type of parameters called Initial parameters. Using Initial parameters makes Report Designer able to only request data that is relevant for the specifics of the report the user is making. In the case of the historical customer- and supplier transactions, this is based on the historical date. Previously, Report Designer retrieved larger amounts of data, then cleaned it to only include the necessary data.
The functionality for Initial Parameters is supported in the following factsets:
- Historic Customer Transactions
- Historic Supplier Transactions
These factsets are duplicates of the old factsets and these are now named Historic Supplier Transactions DEPRECATED and Historic Customer Transactions DEPRECATED.
In this way, this release will not affect any customized reports.
Reports distributed from OneStop Reporting NO will be converted on an ongoing basis.
Create reports with Initial parameters
- Open a report in Report Designer.
- Select the option to download the new version of Report Designer.
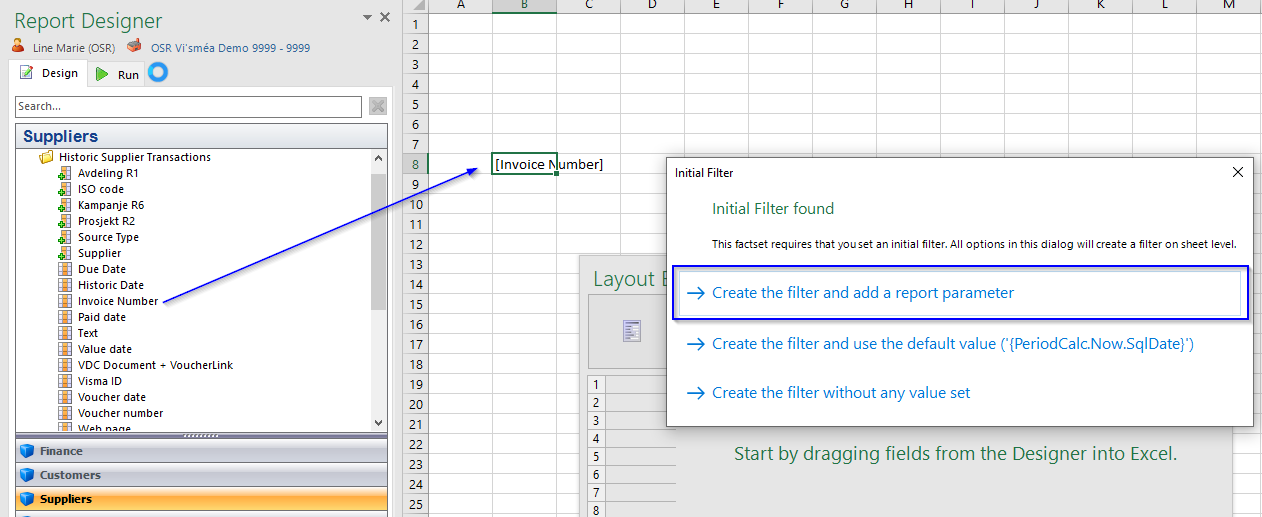
- Drag and drop an attribute from the factsets Historic Customer Transactions or Historic Supplier Transactions.
When you drop the attribute in the sheet, you will get the following options:
NOTE: This dialog will only appear the first time an attribute is used from a factset supporting Initial parameters in a report.
- If you select the Create the filter and add a report parameter option, a filter with a parameter is automatically added to the sheet. This is what enhances the performance of the report. Which value should be used in the parameter is decided when the report is run like any other parameter. This option will be the preferred option in most cases.
- If you select the Create the filter and use the default value option, a filter with the default value is added to the sheet. In this case, the default value will be today's date (SqlDate), the date on which the report is run.
- If you select the Create the filter without any value set option, an empty filter is added to the sheet. If the report is run without any value to the filter, an error message will appear as no value is not a valid date. You can add a value or parameter to the filter later on.
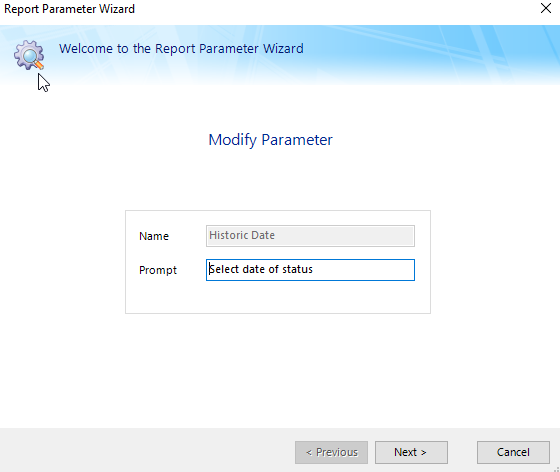
The Initial parameter filter will be created based on the attribute Historic Date (the date you want to see the status of the historic transaction for).
4. .Click Create the filter and add a report parameter.
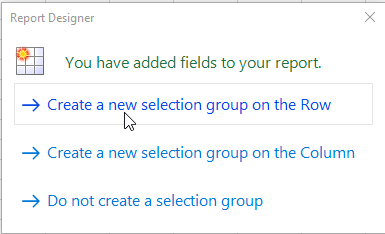
5. Create a group based on the selected attribute in the normal manner.
NOTE: From this point, you can continue building the report as normal.
6. Go to the Sheet filters in the Layout Editor.
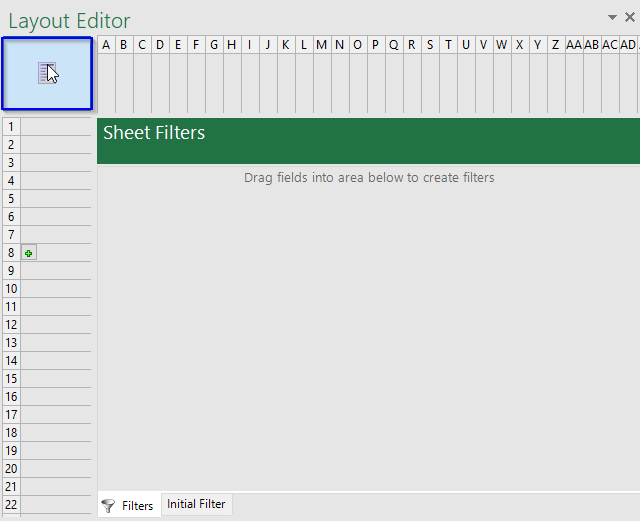
7. Click Initial Filter.
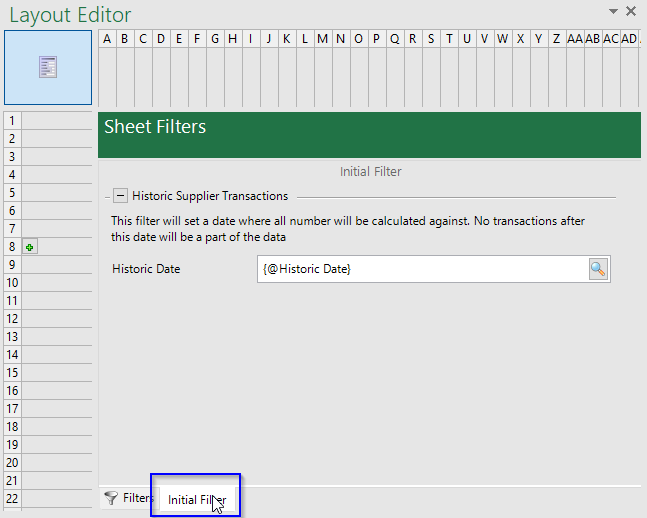
The Initial Filter tab is new. On this tab, the initial parameters enhancing the performance will appear.
Initial parameters will always appear on the sheet level and cannot be added to groups on columns, rows, or cells.
It is not possible to delete these filters from the Layout Editor manually. The filters will automatically disappear if the report no longer contains any attributes from the factsets supporting Initial parameters.
To edit the parameter of the initial filter, continue with the following steps:
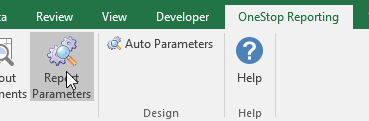
8. Click OneStop Reporting on the ribbon.

9. Click Report Parameters.
10. Click to 📝 Edit the Initial Parameter.
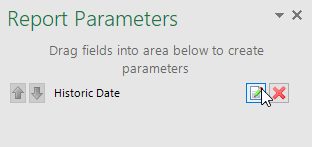
11. Write a suitable Prompt text and continue editing the filter as normal.
12. Finish your report and enjoy the enhanced performance!
What will happen if a user with an older version of Report Designer edits a report previously saved with the latest version?
Users with an older version of Report Designer will not be able to save reports that have previously been edited and saved in the latest version of Report Designer.
It is therefore recommended that all users in the same OneStop Reporting environment update to the latest version so all users will be able to edit and save reports as normally.
NOTE: Users with an older version will be able to open and edit reports in Report Designer, but will not be able to save the changes (As long as the report in question has been opened and saved by a user with the latest version).
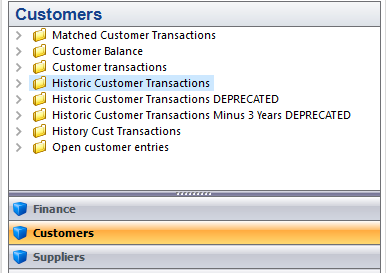
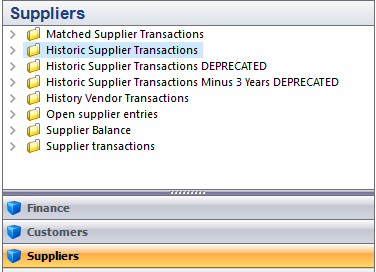
Convert existing reports on historic customer and supplier transactions
To convert reports to run on the new factsets with enhanced performance, all data based on attributes from the old factset must be replaced with the same attributes from the new factsets. Among others, this includes fields used as filters, Grouping/ Sorting, parameters, and directly in the Excel sheet.
NOTE: Best practice is to duplicate the original report before you make any changes. By making a duplicate, you will always have a copy of the original.
If elements from the old factsets are used in the report, it will not be possible to save the changes. It might be useful to build the report from scratch using the new facets to avoid saving issues if not all old elements are replaced.
NOTE: Because it is not possible to save changes in reports including elements from the old factsets, the report must be converted before you make any changes. The naming of the old factsets is shown in the picture below.


Expressions
We have added new functionality to better manage deleted expressions in Report Designer.
Previously, reports containing deleted expressions would fail when clicking Run without much information on how to solve the problem.
How does it work now?
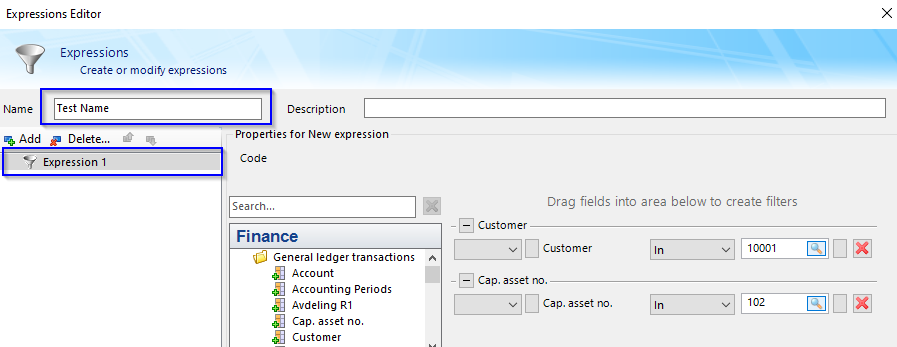
When deleting an expression in use, the user will get the following warning message.
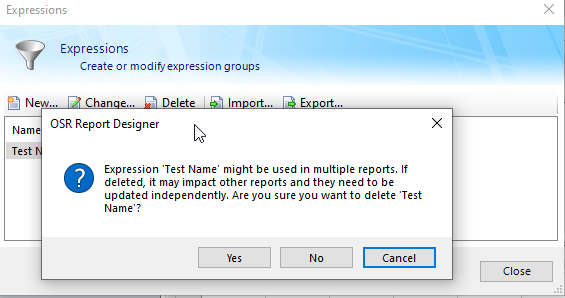
If the Expression is deleted anyways and the user saves the report, a warning will occur informing the user of what expression should be removed from the report definition.
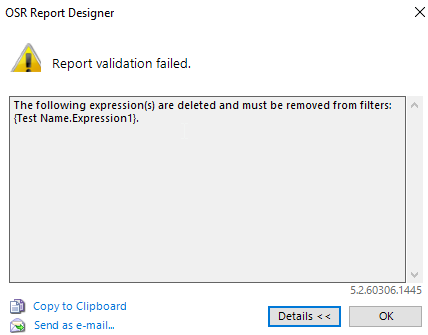
This warning message will also be presented whenever opening a report in Report Designer which includes a deleted expression.
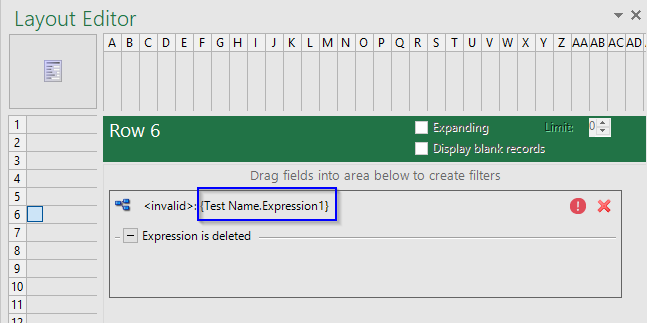
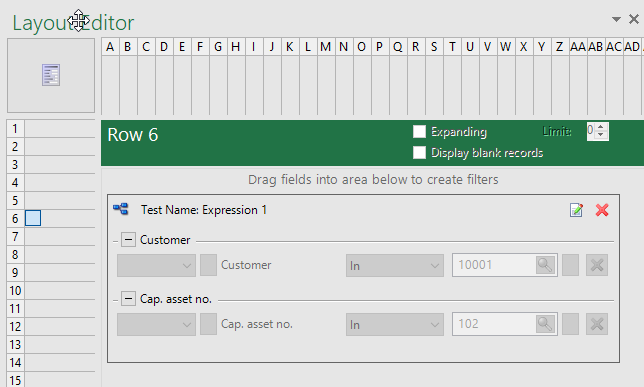
When looking at filters in the report, the filter of a deleted expression will be presented as shown in the picture below:

The user has two options to fix the issue:
a. Delete the invalid expression filter and use other filters. This should be done in every report where the expression is in use. b. Create a new expression with the exact naming of the old expression.
When using this solution, the deleted expression will return in every invalid expression filter of the expression in question.
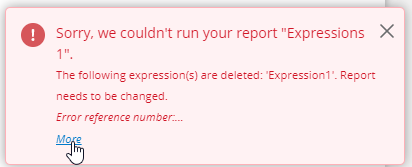
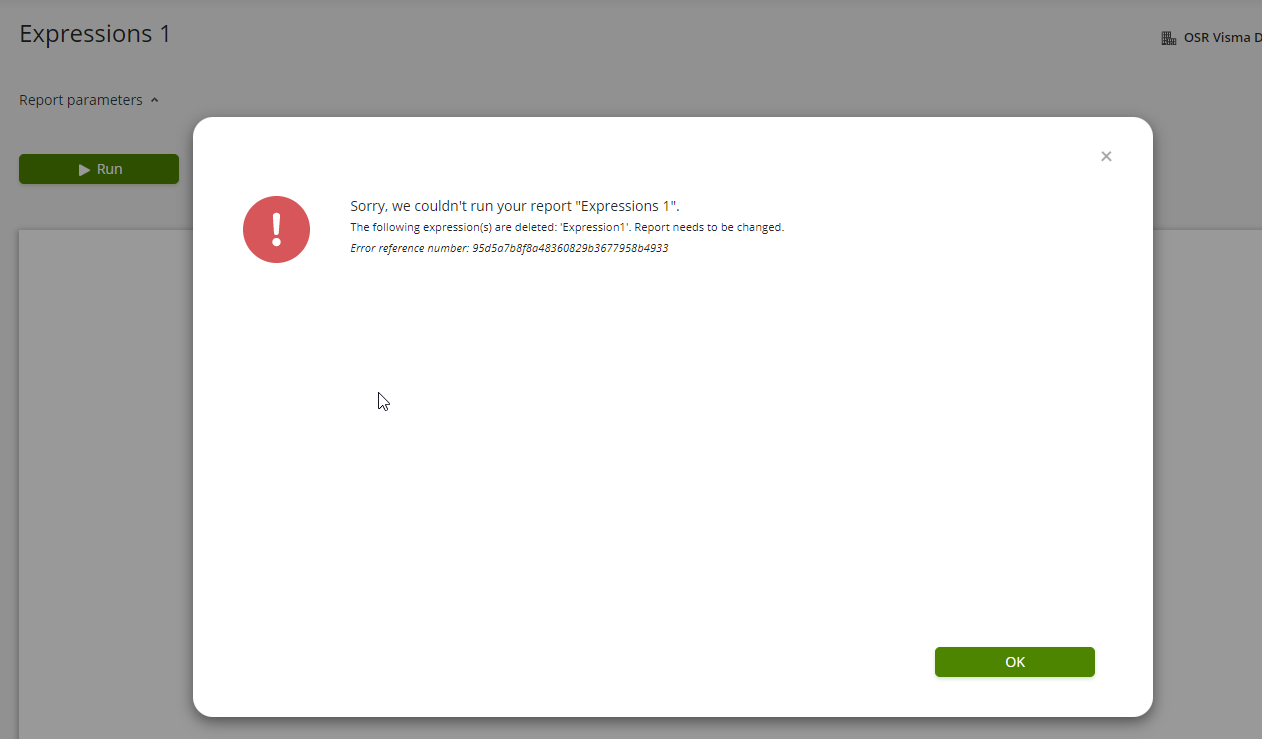
When running reports that include deleted expressions in the portal, the following message of error will be displayed.
New OneStop Reporting logo

We have updated the OneStop Reporting logo in Report Designer

Tenant settings moved to New Administration
We have added the following edit options to Tenant settings in the New Administration:
- Name
- Description
- Tenant Level
- Multi-Company

Visma.net
Data Manager: We have fixed an issue where, for some users, the extension fields would show in the Lookup for multiple companies.
Tripletex
Data Import: We have increased the maximum number of days the user is allowed to use in scheduled data-import jobs from 100 to 200. The user will have to update their import jobs for this change to take effect. This should help companies that are struggling with fetching older data being changed.
| Bugs & Feature Req. | Integration | Module | Factset/Dimension | Attribute/Measures | Comment |
| Bug | Tripletex | DimProject | Fixed an issue where projects older than 30 days were not updated properly (e g name, project customer, project category et c) | ||
| Feature Request | Business NXT API | General Ledger | Voucher | Added Voucher (WaVo). New factset in General Ledger. | |
| Feature Request | Visma Business | Group Reporting | Global Orders | Added Orders to MCL. New Factset in Group Reporting. | |
| Bug | Visma Business, Business NXT API, Business NXT Live | Multiple | Fixed an issue where the drilldown would be duplicated due to Voucher Series | ||
| Bug | Visma.net | Project Management | Improved Workhours endpoint by adding the LastChange and FromTime filter. Added deletion workhours endpoint to include deleted entries. | ||
| Bug | Visma Business | Group Reporting | Fixed an issue where the MCL setup would fail on OSRTransactionTypeMCL. | ||
| Bug | Visma Business, Business NXT API, Business NXT Live | Multi-Company Reporting | Global Products | Fixed the link between Global Product and Product Transaction | |
| Feature Request | Visma.net | PM | Project | Added new endpoint Project Keywords linked to Project Dimension | |
| Feature Request | Visma.net | Inventory | Added Intrastat details to Inventory Dimension |