User Roles and Report Labels
With Roles and Labels, it is possible to distribute specific reports to specific users.
Report labels are selected for each report and role, and then users are added to roles.
Which reports the user will have access to depends on the user's role.
Distribution setting: Use labels to filter reports
Only administrators at the top (customer) level are able to edit this setting.
To turn on the functionality for Roles and Labels, the setting must be selected at the customer level. Before the setting is selected, Roles and Labels will have no effect.
In this way, you can create roles, add users to roles and add labels to reports without it affecting your OneStop Reporting environment before you are ready.
If labels are not added to reports and users are not given roles, reports will not be available for users if the setting is selected.
Change Distribution setting
- Go to the Administration.
- Click the top level in the organization tree.
- On the Customer settings tab, click ✏️ to edit Distribution settings.
- Select ✅ the Use labels to filter reports checkbox.
Reporting Labels
Reports distributed from OneStop Reporting NO
All reports distributed from OneStop Reporting have predefined labels which cannot be changed. These labels are determined by Visma Software in the country where you purchased OneStop Reporting.
View labels set on reports
- Go to Reporting or Distribution.
- Click Options on a report template.
- Click View details.
Add labels to Reports
Only administrators can add labels to reports. The Administrator must be an administrator at the same level or a higher level than the report is distributed.
Consequently, if a report is only distributed to one client, a client administrator can add labels to the report, if a report is distributed to a group, a group administrator can add labels, and if a report is distributed at top level only a top level administrator has access to add labels.
To add labels to reports;
- Go to Reporting or Distribution.
- Click Options.

- Click View details.
- Click ✏️ Edit.
- Add labels and click Save.
Roles for Distribution
See Create roles for information on how to create and manage roles.
Use Case example
In the picture below, a role for all sales employees in a company is created.
The reason why the particular labels and label settings are selected is explained below.
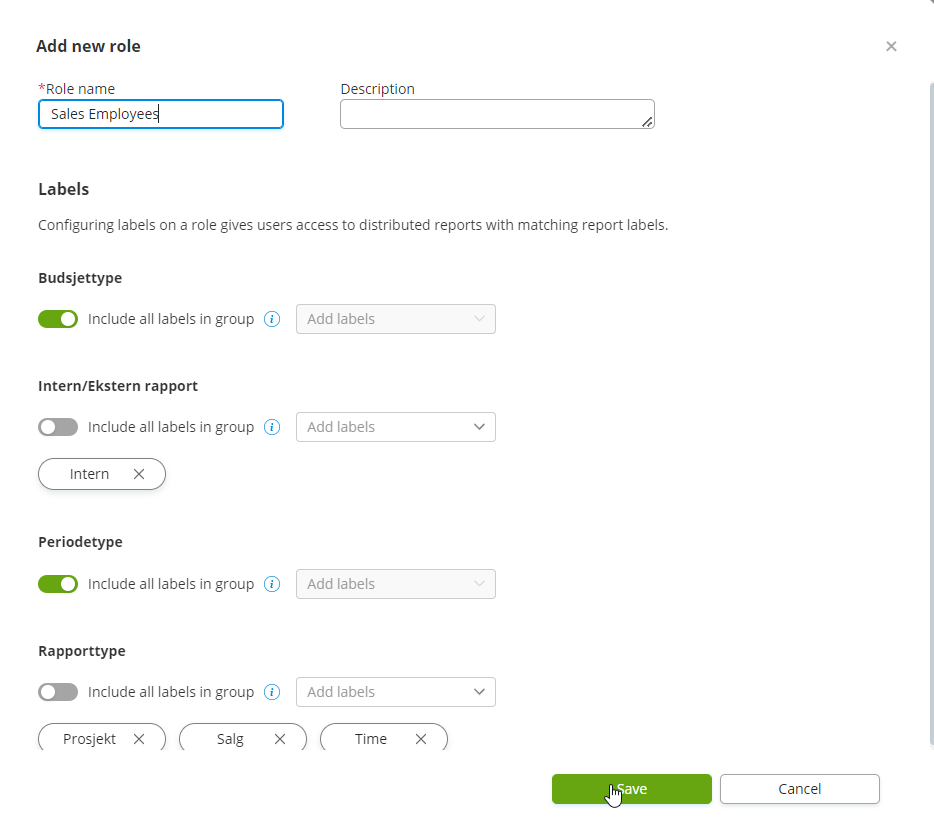
The setting Include all labels in group is selected on Budget Type and Period Type.
This is because all sales employees should have access to all reports regardless of the budget type and periods used. If more budget or period types are added to reports in the future, the sales employees will also have access to these as long as the reports fit the other criteria.
It is further chosen that the sales employees should only have access to reports with the labels: Internal, Project, Sales, and Hour. If more labels are added to these groups in the future, the sales employees will not automatically gain access.