Page setup for reports
- (If not already open in Report Designer.) In Reporting, click
 Edit to open the report in Report Designer.
 - Mark the area of the report that you want to include, for example, for PDF outputs. NOTE: Make sure you do not include areas with hidden rows or columns because these will appear as large white areas in the report.
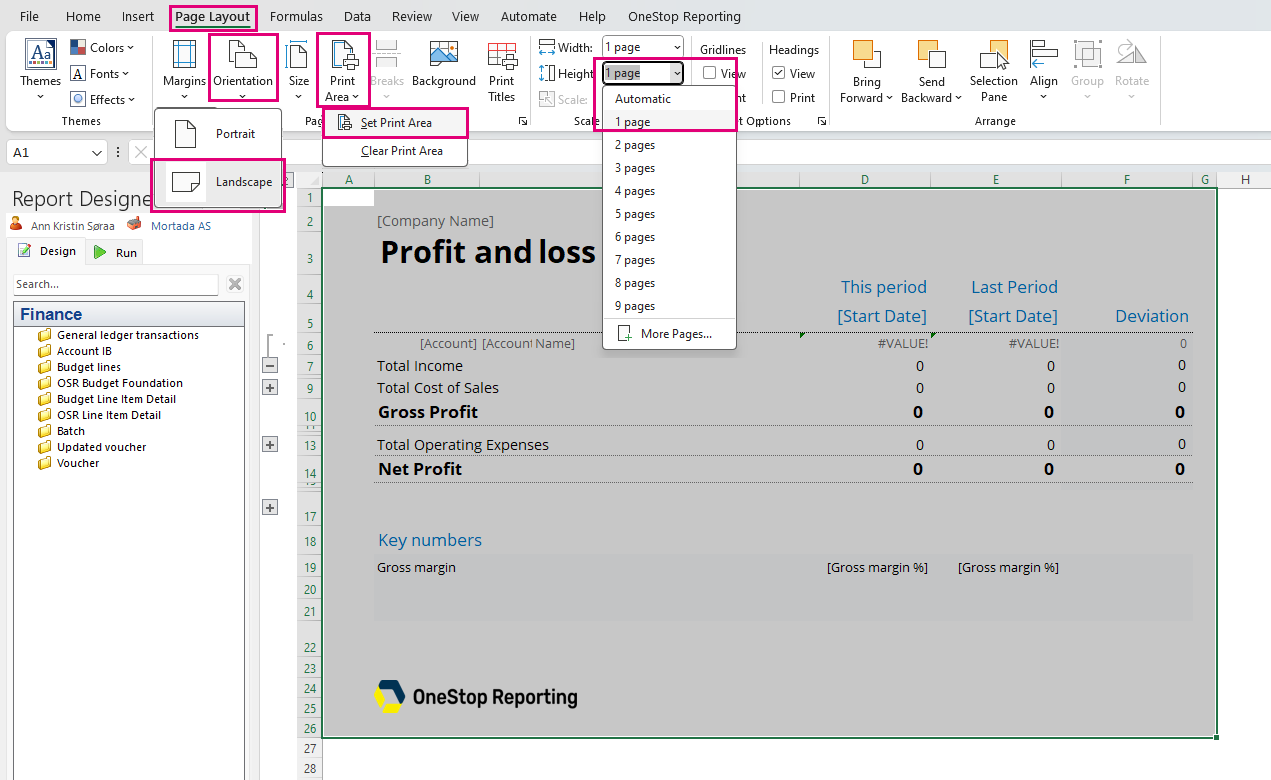
- On the Page Layout tab, in the Page Setup group, click Print Area.
- Click Set Print Area.
- In the Scale to Fit group, select 1 page from the Width list.
- In the Scale to Fit group, select 1 page from the Height list. NOTE: If you have a very long report, for example, reports with large amounts of transaction listings, you should consider setting this option to Automatic.
- In the Page Setup group, click Orientation and then click Landscape. NOTE: Even though this option is usually best for most reports, you should also consider using the Portrait option.
- Upload (Ctrl+S) the report to OneStop Reporting.
Tip
It is a good idea to check your report in the portal;
- In Reporting, run the report.
- Click the lower part of the
 Export to Excel button and click Download as PDF.