January 2024
Changes in Administration
In our ongoing commitment to enhance user experience and improve functionality in Administration, we introduce some updates and optimizations in this release. Firstly, the new Administration is now the primary, although some functionality still remains in the old Administration. These are accessible via a new tab called Old Administration.
Add new user and add users to a group or client
- Click Administration.
- (If applicable) Click on top, group, or client level.
- Go to the Users tab.
- Click Actions > Add users.
- In the Enter email address field, either type in or paste in the email addresses separated by spaces, line breaks, commas, or semicolons. You can add up to 50 email addresses at the same time.
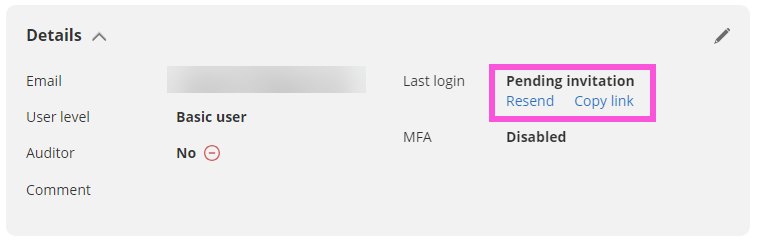
- Click Add. NOTE: Your new user(s) will receive an email where they must click the Accept Invite button, fill in their name, and set a password. The Accept invitation is valid for seven days, so if the invitation is not accepted by then, you must resend it. This can be done by clicking on the user and clicking the Resend button under Details, or copy the invitation link and sending it to the user.
Now you can edit the user as described below.

Edit user
- Click Administration.
- (If applicable) Click on top, group, or client level.
- Go to the Users tab.
- Click the user name.
You can perform the following changes:
Edit user details
- Next to Details, click
 Edit.
Edit. - Edit user name or change user level. NOTE: See user level for more information on the user levels.
- Click OK.
NOTE: It is possible to label a user as an Auditor. The advantage of this is, for example, if you want to add temporary users and be able to easily identify such users. Marking a user as an Auditor does not give the user any permissions or access rights.
Give company access
- Next to Company access, click
 Edit.
Edit. - In the Select companies list, select company/companies.
- Click Save.
Give customer, group, and client access
- Next to Customer, group and client access, click
 Edit.
Edit. - In the Search for access to add list, select the customer, group or client the user should have access to.
- In the Admin column, select the Admin check box if the user should be an administrator at that level.
- Click Save.
Assign role
- Next to Roles, click
 Edit.
Edit. - In the Search for roles list, select the role the user should have.
- Click Save.
Added resend invitation link and reset Multi-factor authentication in the sidebar of the user
When an administrator has added a new user, the new user(s) will receive an email where they must click the Accept Invite button, fill in their name, and set a password. However, the Accept invitation is valid for seven days, so if the invitation is not accepted by then, the administrator must resend it. This can be done by clicking on the user and clicking the Resend button under Details, or copy the invitation link and sending it to the user.
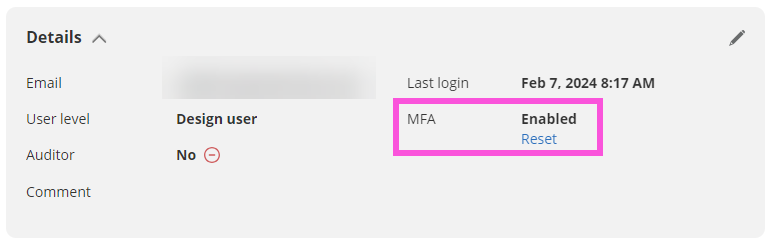
On the same tab, the administrator can also reset the Multi-factor authentication. This may be necessary if a user has lost the device on which they had the authenticator app. After the reset, the user is able to change the device.
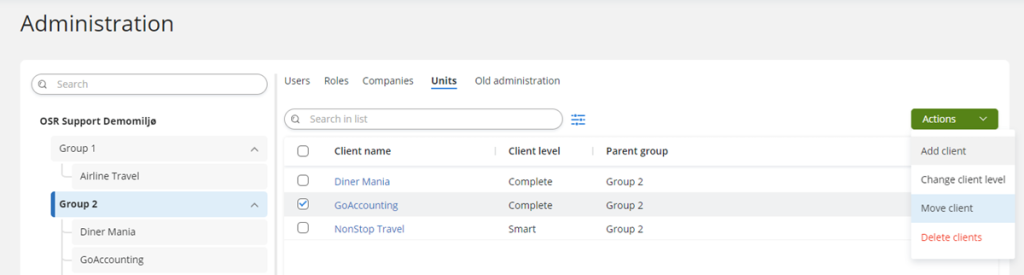
Move Client functionality added to Administration
A client can be moved to different groups or higher in the tree structure in the new Administration.
To do so;
- Go to Administration.
- Go to the Units tab.
- Select ✅ a client. NOTE: You can only select one client.
- Click Actions > Move client.
- In the list, select the location where you want to move the client. NOTE: Only groups/customer you have access to are available in the selection. Users will keep the access to the client if it was direct access, but if it was inherited access from the group, the access will be removed.
- Click Change. The client has now been moved.
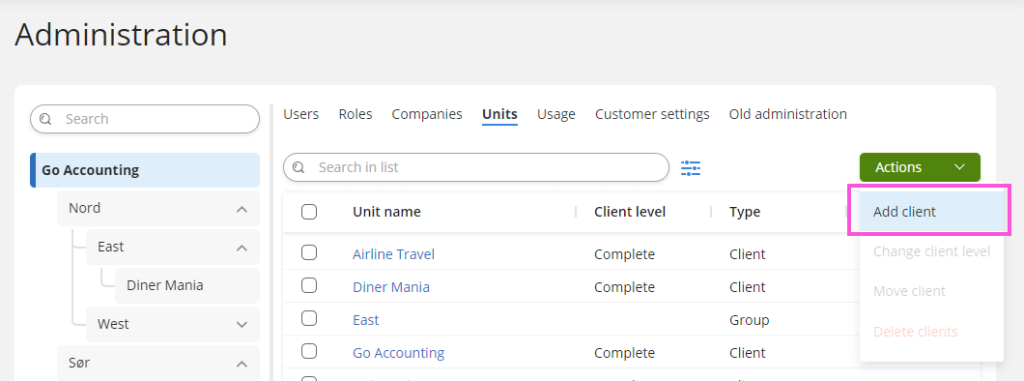
Add new client
We have moved the functionality to create a new client to the new Administration.
To create a new client;
-
Click Administration.
-
At the top level (your company), or at the group level, go to the Units tab.
-
Click Actions > Add client. HINT: A client is a separate portal environment. You can think of it as a separate portal, where only added users have access.
-
In the New client dialog box, fill in these fields:
- Name
- Description (optional)
- Level (Start, Smart or Complete)
- Integration (accounting system)
-
Click Create. The client is added. You can add as many clients as you need.
-
Click Close when you are done creating the clients you need.
To go to the new client, click your user name button in the upper right corner, mouse over Clients, and click the client. If you have more than one customer (top level), you must select the appropriate Customer from the list to see the underlying clients.
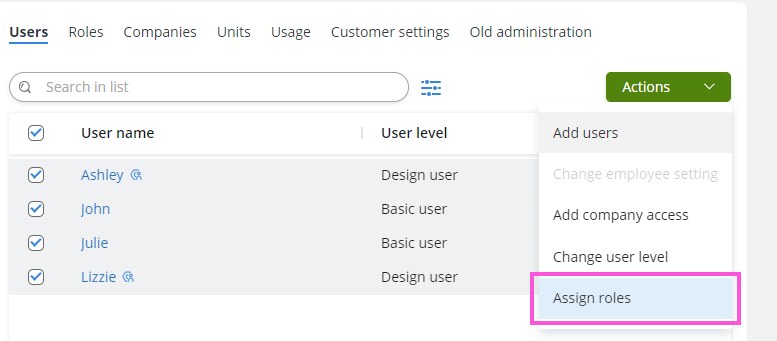
Assign roles for multiple users
We have now made it possible to assign a role for multiple users in one operation.
- Click Administration.
- Click on customer, group, or client level.
- Go to the Users tab.
- Select ✅ one or more users.
- Click Actions > Assign roles.
- In the Search for a role to add list, select the role you want to assign to the users. NOTE: Click the blue text to see which users you have selected.
- Click OK.
Other Administration enhancements and fixes
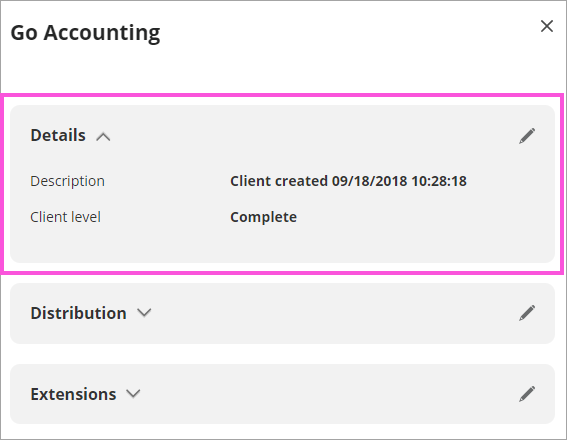
Moved Client settings to sidebar
We have moved the Client settings to the sidebar. The settings can now be found under Details when clicking on a client under the Units tab.
Client access vs. company access
When an administrator adds company access for a user, the user will not automatically get client access.
Add users- email validation fix
We have fixed a validation issue where the email was case sensitive when validating email addresses in Add users. The validation is no longer case sensitive.
Swedish Chart of Accounts is now available
We have now added Swedish Chart of Accounts for the Business NXT and Business NXT integrations. TIP: Read how you can customize the Chart of Accounts.
Fixes
Visma.net integration
We have fixed an error where inventory items would be duplicated in Data Manager.
Bug fixes and feature requests per integration
| Integration | Module in Report Designer | Factset/Dimension | Attribute/Measures | Comment |
|---|---|---|---|---|
| Visma Business Business NXT Business NXT Live | Data Manager | NaN | NaN | Added OSR to display names for OSR Budget factset to make it easier to distinguish between OSR tables and regular tables |
| Visma Business Business NXT Business NXT Live | General Ledger | Product | NaN | Added Created date |
| Visma Business Business NXT Business NXT Live | General Ledger | Accounts | NaN | Added Gr1 and Gr2 to the lookupdisplay for Account, thus they are available as options in the chart of accounts. |
| Visma Business Business NXT Business NXT Live | General Ledger | Accounts | NaN | Added the field "MVA specification" |
| Visma Business Business NXT Business NXT Live | General Ledger | Actor table | NaN | Added Birthdate to Actor table. |
| PowerOffice Go | General Ledger | FactOutgoingIncoiceLines | NaN | Fixed an issue in drilldown in OutgoingInvoice |
| PowerOffice Go | General Ledger | OSR Valutakurser | NaN | Fixed an issue where OSR CurrencyType and OSR Currency rates would give an error in Data Manager |
| Xledger | Data Manager | NaN | NaN | Fixed an issue where the import for GLObjects would fail. |
| Visma Net | General Ledger | Customer Payments | NaN | Changed existing field: Available Balance in Customer Payments to: Remaining Amount. It is now a calculated field based on Available balance + Applied to document. Added a new field for Available Balance that works the same as the old field |
| Visma Net | General Ledger | SalesOrderLine / PurchaseOrderLine | NaN | Fixed an issue where doing a lookup for order numbers would fail. |
| NaN | NaN | NaN | NaN | Fixed an error where inventory items would be duplicated in data manager. |
| Partner Insight | General Ledger | Company | NaN | Changed link to Customer in Subscription Added LastModified date as External field Added ModifiedBY as External field Fixed Byrå Produkt to accept letters in Data manager |
| Partner Insight | General Ledger | User | NaN | Added Customer No as External field |